Wednesday, December 23, 2009

Merry Christmas Eve Eve!

I have a little something for you! It is a different sort of homemade gift.

It's "Lady Harvatine's Ukulele X-mas", a little 5 track album full of four-stringed Christmas cheer. It started out as a joke between Harv and I many months ago. But with the help of a friend with many musical talents, we actually made it happen! I can hardly believe it myself.

Since I can't send you all a copy I am putting all five mp3's up here for download, and if you really want the full experience, you can burn the songs to a disc and make your own state-of-the-art cd sleeve! How you ask? Allow me to demonstrate.

1. Print that baby out (on cardstock if you have it, otherwise paper works fine). Cut said baby out.

2. Score along the three folds. (I use a little metal stylus. You can use the back of an exacto. Not necessary if you printed on plain paper.)

3. Fold.

4. Glue.

5. Enjoy!


Get the music:
(Right-click or control-click to save them to your computer.)


Merry Christmas, happy holidays, etc! I'll be back soon with more homemade gifts of the standard variety.

Sunday, November 29, 2009

A quilt for Lily

An old old friend of Harv's and his wife had their first baby not too long ago. We happened to be in the same state as them when little Lily was just 2.5 weeks old so I was able to give them this quilt in person.
Now the baby is not to be confused with my little Lilly. (Their names are spelled differently, that's how you can tell the difference.)
This quilt was inspired by the vintage looking floral print. I'm not sure what it is but I'm sure I ordered it online.
I figured little girls these days are inundated with pink so why not balance things out a bit. I don't do much purple but I had just the right shade of gingham to match the floral. In fact, I didn't have to buy a single new piece of fabric for this quilt. I really didn't think I would have much luck matching many of the colors in the floral so I was quite surprised with what I was able to dig out of my shelves.
Plus, the backing fabric I had just acquired from the fabric swap we did at the last LA Modern Quilt Guild meeting. So thanks to whoever brought that in!
I tried a new-to-me method of quilting on this: loop-d-loops. It was fun to do. Far from perfect but fun. I like quilting that is dictated by the quilt top but this still has the forgiving qualities of stippling that you lose with straight line quilting, if you know what I mean.

Tuesday, October 13, 2009

Long Time Coming

First: a huge thank you for all of your comments on the Emmy. You all are the best and It's nice to be able to share some of the non-quilting in my life.

Second: Last night I attended the first ever meeting of the LA Modern Quilt Guild. It was a great meeting full of amazing ladies and I'm so excited to meet like minded quilters in this area. If you live around here (or are willing to drive to LA) check out the guild. It looks to be a guild like no other, in a very good way!

Third: Remember this guy? Probably not because I started it two and a half years ago. The plan was to hand quilt circles all over this mother. I worked on it some, my hand-quilting sucked. It wasn't fun. So it was put away.
Well, two and a half years later I have resurrected this quilt from obscurity. I actually had to search for it when I decided to do this.

The hand-quilting was out. It's not my style and I'm just not interested. So I ripped it all out.

One of the reasons I didn't do this sooner is because I couldn't really think of a style of quilting that would work better than additional bubbles. Which is weird because once I came up with this straight lines idea, I liked it so much better! Maybe that's just my 2009 tastes compared to my 2007 tastes. Perhaps I'm less literal now.


So, if you weren't around back then and you want to read about this quilt's beginnings you can go right ahead!

Wednesday, September 16, 2009

New Addition (Part 3 of 3)

Well, I didn't make this one.

Can you spot it?

That's right. I won an Emmy! Can you believe it?

The award is Individual Achievement in Animation and I won for animation I did on an episode of (the now canceled) Moral Orel called Sacrifice.
(My parents, Harv and I before the ceremony)

I know this is a craft blog, not a stop-motion, self-promotion blog but come on! It's too exciting not to share. So this is just a little peek at what's been going on in my work life. I've really been feeling like I have settled into my career. It's not just a job. It's also not something that I'm struggling to do, hoping that no one figures out how under qualified I am. I feel like I know what I'm doing and I can hold my own out there. It's a nice feeling!

So...if you happen to be home at 1 o'clock tomorrow (Friday) afternoon turn on E! and you might get to see me give my speech. They're televising a 2 hour special of the Creative Arts Emmy ceremony which actually took place last weekend. Of course, the ceremony was four hours long so I may end up on the cutting room floor. So just in case, we have a bootleg iPhone movie! Enjoy my awkwardness!

Monday, September 14, 2009

New Addition (Part 2 of 3)

Ok, it's not Friday as originally promised but you've probably come to expect such tardiness from me.
After hanging my lovely new kitchen curtains, my eyes fell upon the sad, ragged, always dingy kitchen rug. It simply would not do.

This rug is made from curtain scraps and fabrics chosen to match, all of which I had on hand. The fabric was cut in two inch wide strips and braided together. When I reached the end of a strip I just added a new one, overlapping about an inch.

When I had a lot of braid, I started sewing rows together, using the zig-zag stitch on my machine. My rows are 21" wide. I sewed almost to the end of the braid and needed more so I kept braiding.

Some tips if you want to try making your own rug:
  1. This is a super way to use up fabric that you don't really like. As long as the colors work, the pattern is indistinguishable once it's braided.
  2. Never have a made something more conducive to watching movie upon movie while working. This takes .2% concentration.
  3. You may have to lift your presser foot to get the rug underneath. I didn't even know that was possible until making this rug!
  4. Speaking of presser foots (feet? No, foots), after lifting it and cramming your rug underneath it, you may forget to then lower the presser foot lever as the foot itself already appears to be down. Do not be fooled! You must still lower the lever for if you do not you will encounter (seemingly)inexplicable tangled mess after tangled mess. Not that it happened to me. No no. I just heard that it could happen. From my friend. Biz.

Part 3 of 3 tomorrow, I swear! And man is it the best of all parts!

Wednesday, September 09, 2009

New Addition Part 1 of 3

Intriguing, eh?
As I am the #1 cook in the house, Harv is automatically the #1 dishwasher. We both work fairly late which means dinner is late and Harv is often doing dishes at 10:30 at night. We haven't had curtains in the kitchen since we moved into our house 3 years ago and he gets a little creeped out being in there so late, knowing the neighbors and any creatures of the night could be watching him.

We bought this fabric a long time ago, I believe when the line first came out. It's from Anna Maria Horner's Drawing Room collection. The colors couldn't be more perfect in our kitchen.
It took me some time to get motivated to actually make the curtains. I wanted cafe style but I didn't want to just make a sleeve at the top of the curtain. Instead I sewed equally spaced tabs to the backs, copying some Ikea curtains I bought recently.

I chose the kitchen wall color before we moved in and have always been a little unsure about it. It just seemed like it was a little too much. The yellow Kitchen-Aid balances things a little but I think adding the curtains really ties everything together. Now, I love the wall color. It works.

So, here's a little sneak peek at part 2, coming Friday. You're all pretty smart, I'm sure you can guess what it is. Part 3 on the other hand, hoo-boy! It's a doozy. You'll just have to wait and see.

Saturday, July 18, 2009

Stacked Coins

This quilt was given to two friends who got married a couple of weeks ago. The pattern is certainly nothing new. Not that I know anything about the history of stacked coin quilts of course. They're Amish maybe? This one was inspired by the pattern in Last-Minute Patchwork and Quilted Gifts though I didn't actually follow the pattern.

The book asks you to cut strips with scissors to get a "wonky" look to your coins. I'm all for irregularity but I'm not totally digging the wonkiness these days. So instead, I cut strips of different widths using a rotary cutter.

This is the first quilt I've made using 100% linen (the closest I've come is this one with a cotton/linen blend). I've got to say I absolutely love the way it turned out! It's so soft and drapes beautifully. It's a little trickier to use than 100% cotton because it shifts so easily. You could do a lot of pinning to combat this. I try to pin as little as possible though so instead I used spray starch when I ironed the prewashed fabric. This technique worked great.

I made my own spray by mixing 2 tablespoons of cornstarch with 2 cup of water in a spray bottle. This mixture does leave a white residue on the fabric but it didn't matter to me since I would wash the quilt before giving it away. I've read that if you boil the ingredients together instead of just mixing this won't happen but I can't say whether that's true or not.

The colors of the quilt were inspired by the wedding invitations. I magically had everything I needed to make this quilt on hand. I don't think I have ever done that before! The two solid blue/green fabrics are what's left of my Kaffe Fassett shot cotton. In these colors at least. And I still have scraps. I just love it so much! I want all of this fabric to be mine!

And of course, there has to be a matching card.

Monday, June 01, 2009

Broken Lines

I haven't had much time to sew lately but I really wanted to make some sort of quilt for my friends Sarah and Olivier's baby shower. They are the couple that I made these table runners for last year. Now they are expecting their first baby, a boy.

This quilt was designed to be completed in the limited time I had available this week. It's super simple but my taste usually tends toward simple anyway.

I love the way this turned out. The colors are so pretty. As I'm writing this I kind of want to make a plus sized version for myself.

Two keys to getting this done in time:
1. The size of the quilting (bigger spacing than I would normally do).

2. The size of the quilt. I used the "craft size" batting, 36" x 44" I think. The last baby quilt I made was much bigger. Bigger is nice but in the end it seemed like overkill for a baby. This small size is much more conducive to blankie-fication which I would love to see happen with something I've made.

Sarah and Olivier picked out the backing fabric for the table runners for their wedding but it didn't come in time for me to use it. I'm glad I was able to put it to good use.

And of course, one must make a matching card from the scraps.

PS I've been wanting to attempt actual pattern writing, not just the half-assed variety I am wont to do. I thought I would start with some sort of free pdf and see what kind of interest is out there. Would you like to make this quilt? Drop me a note or a comment if so. I think this one would be a good start. Thanks!

Tuesday, April 14, 2009

First Quilt in a Long While

Fresh out of the wash, Oh Fransson!'s Mod Sampler quilt-along quilt.

It's a gift for the daughter of an old friend.

There's a WHOLE lot of pink in this baby. Much more than I would normally go for but when someone looks this great in pink, come on! I'm pretty sure I had no choice.

The blocks were made entirely from fabric I already had. That was great. These are all fabrics that I really like but I just don't find a lot of opportunities to use them.
I bought the backing and sashing fabrics. The sashing is linen which I've never used in a quilt before. It was a little trickier than cotton. It can be pretty wily. I do really like how it turned out though.
The label is a piece of the linen I used for the sashing. It's stamped with Jacquard textile ink.
Gracie's mom is allergic to cats so I tried really hard to keep this quilt cat free. Stabone is sulking because I won't let him lie on it.

Monday, April 13, 2009

Back to Bubbles

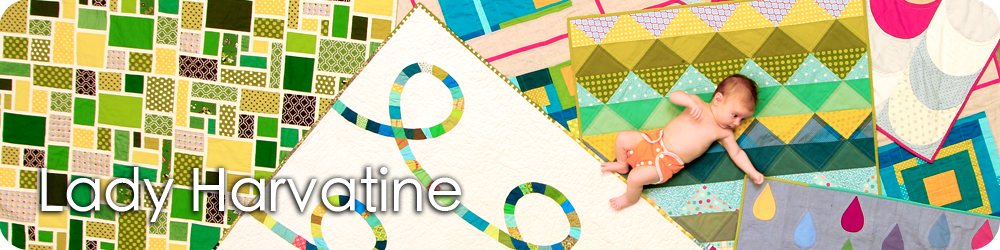
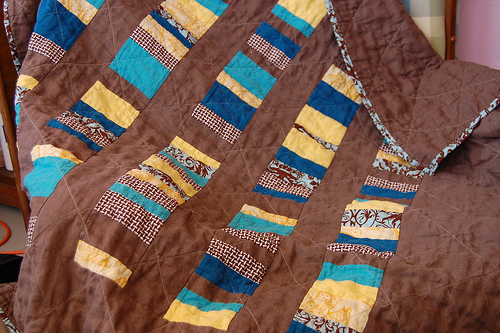
I recently played major catch up (though I'm still not quite caught up) on my Common Threads bee blocks. You can see the whole lot here.
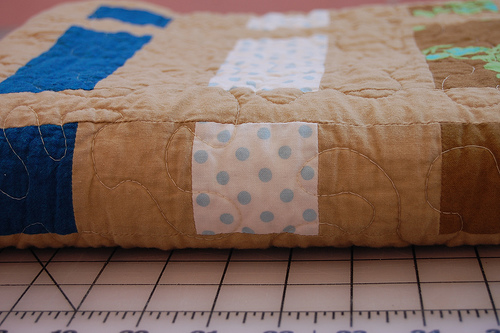
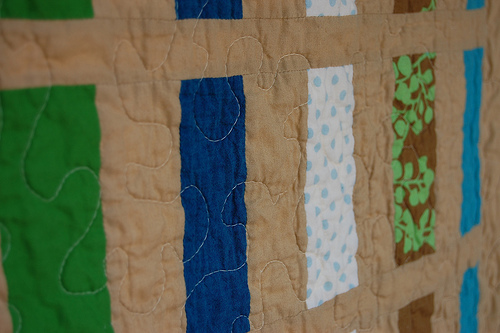
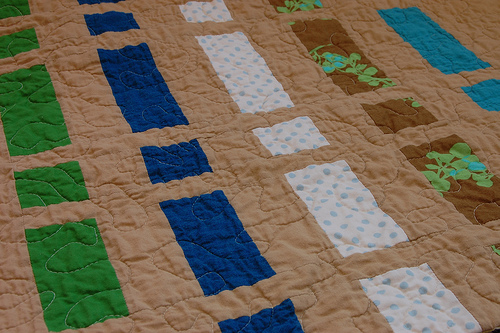
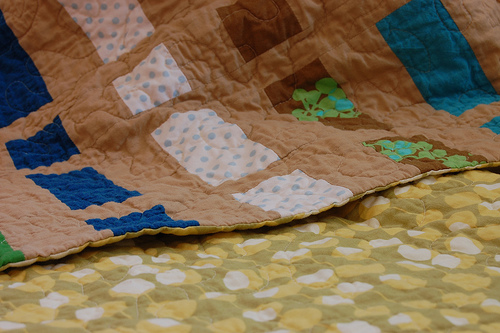
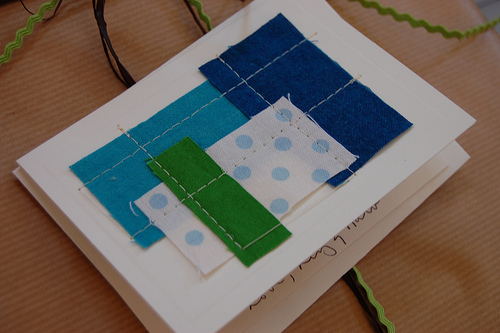
This is the last one I finished.

It's for Jacquie who is making a quilt for her teenage son. The instructions were "minimal, modern and masculine." The inspiration for this design came partly from reading about Dale Fleming's technique for sewing pieced curves which I found here at Dioramarama.com. If you want to learn this technique you can visit either of these sites for thorough instructions but I thought I'd walk you through the basics of this block. It was a little different because of the multiple overlapping circles. If this all seems confusing you should visit one of the above links. Then it'll all make sense, I swear!

To cut out my circles from the freezer paper, I used this handy dandy tool. It works ok. Better on smaller circles than large ones. You could use scissors as well as long as you draw a perfect circle on the paper to cut out.
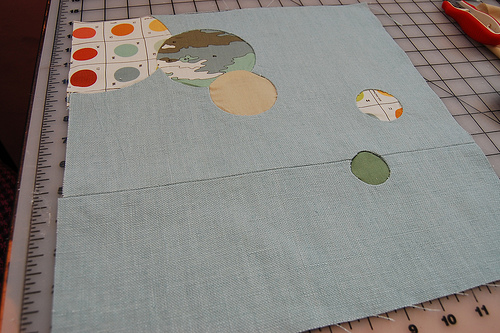
I started with the circle in the corner since it was on the "bottom" of all of the overlapping circles. I cut out the size of circle I wanted from freezer paper and ironed the shiny side to the wrong side of my background fabric like so, positioning the hole where I want the pieced circle to be.

The piece of colored dot fabric is what I'm going to piece to the background. It's about 1/2 in bigger all around than the fabric you see inside the circle.
Next, I cut away the BG fabric inside of the circle, leaving a roughly 1/2 in seam allowance.
Then I clipped the curve right up to the paper, all the way around.

Next, I took a glue stick and glued the clipped edge to the back of the freezer paper. This should make a nice smooth curve if you look from the other side.
When that glue was dry (which only takes a few seconds) I applied more glue to the back of the clipped fabric which I pressed the colored dot fabric to, thus allowing me to remove the freezer paper all together.

Tada. Unfortunately I have no photo of the actual sewing. You press and sew along the nice little crease you've got there, all the way around your circle, or semi-circle in my case. Flip it over and voila.

To make an overlapping circle I just placed my next freezer paper stencil over the seam, doing everything the same, treating the pieced er, piece as a solid background.
This only got tricky when it came to gluing the seams down. Because there were multiple layers of fabric I had to do some creative trimming. Also, this background fabric was some thick-ass linen! Things got a little bulky which is why some of my circles aren't exactly perfect. I would not do this again with fabric like this. Cotton on cotton though would be much less of a hassle.
I did the last three circles all at once since they weren't overlapping each other at all. The smaller circles were harder to sew than the large ones.
And that's it! Again, this is no where near a comprehensive tutorial so if you really want to try this technique visit the links above.