Monday, November 29, 2010

It's Beginning to Look a Lot Like...

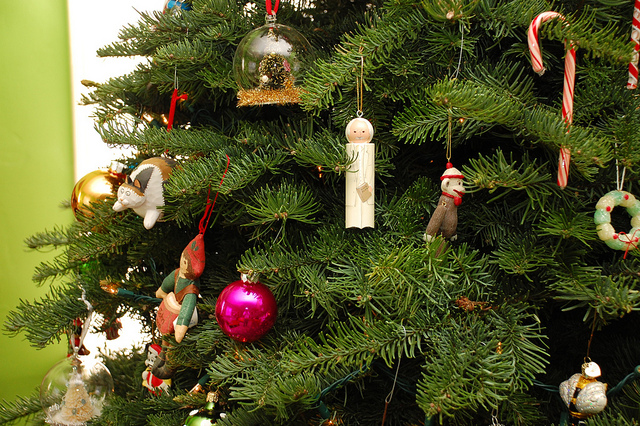
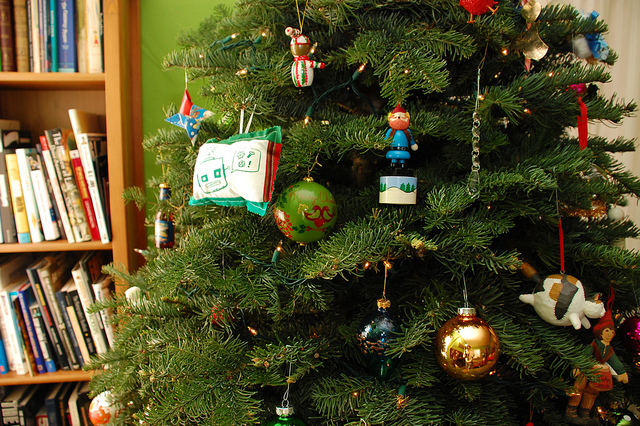
Harv and I won't be traveling anywhere this Christmas for obvious reasons so we actually bought a Christmas tree for the first time in several years.  We're normally in Connecticut or Minnesota for the holidays and working hard right up until it's time leave so the Christmas cheer gets put on hold and the decorations stay in storage. 

DSC_0066

But since we're going to stay home this year I wanted to make sure we made the season last as long as possible!

DSC_0063

I'm the oldest of four and when I went off to college my family started buying a Christmas tree the weekend after Thanksgiving.  The whole family was together then and wouldn't be again until Christmas break.  The tradition has stuck, even now that the youngest in the family has graduated (yipes!) so I was quite open to getting things started as soon as the Thanksgiving leftovers were in the fridge.  Of course it's much less idyllic picking a bundled up, pre-cut tree from the lot in front of Lowe's than it is taking a sleigh ride out into the middle of a Connecticut tree farm and tromping through the snow to find the perfect tree, then cutting it down yourself.  But hey, we live in Southern California, what choice do we have?  We actually did go to a Christmas tree "farm" our first winter out here.  It was underwhelming to say the least.  The trees were crazy expensive, growing in a dirt lot not too far from the freeway and you didn't even get to cut them down yourself!  Not worth it.

DSC_0041 

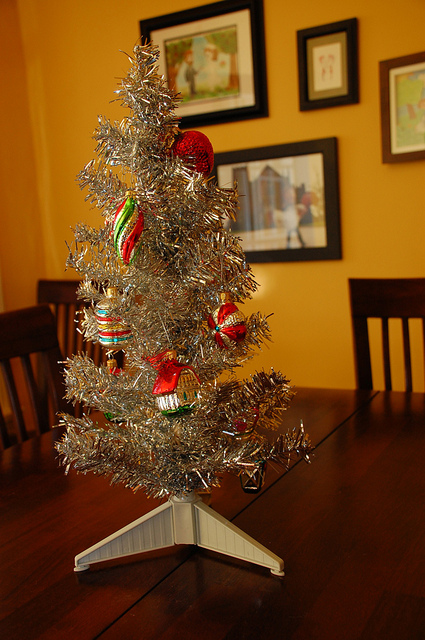
We also dug out plenty of other decorations including this somewhat sad little tree that last made an appearance in my craft room.  I'm not sure where he'll end up but he's working as a centerpiece for right now.  This little guy and the grand master tree are both in need of tree skirts so I'm putting that near the top of my list.

DSC_0078

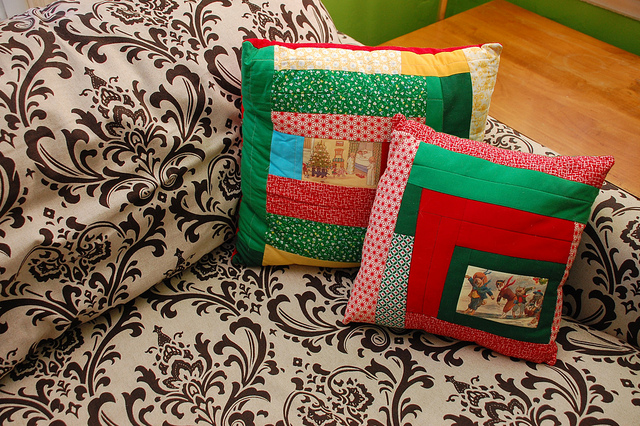
I want to say I'll give a prize to anyone who was reading this blog when I made these pillows but all I have to offer is Christmas cheer.  I hadn't quite worked out my style back then.  This was me trying to be Denyse Schmidt-like and not really succeeding.  But they're out on the couch anyway.  As I've learned from decorating our tree with every single ornament Harv was given or made as a child (his mom has long since moved on to a color coordinated tree) Christmas decorations are as much about memories and sentimentalism as they are about style.

DSC_0081

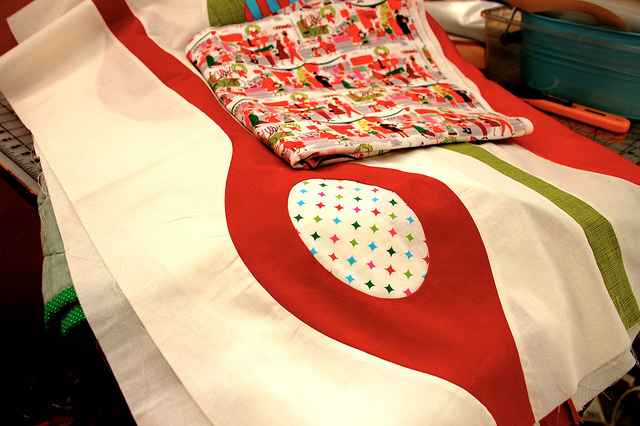
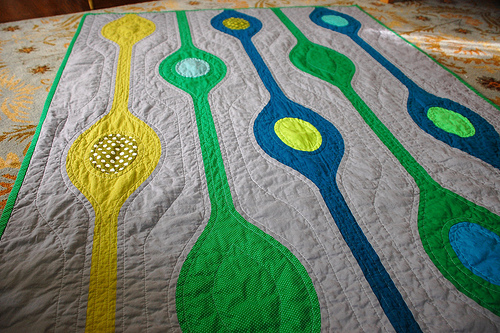
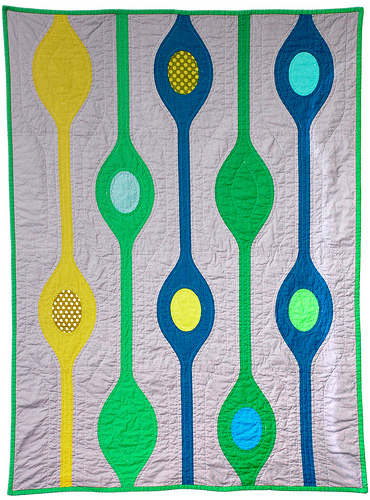
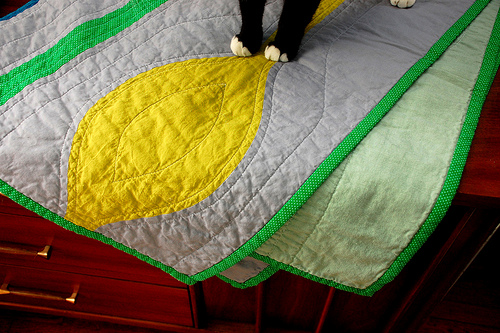
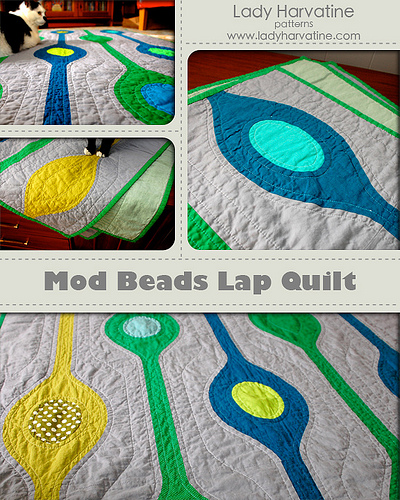
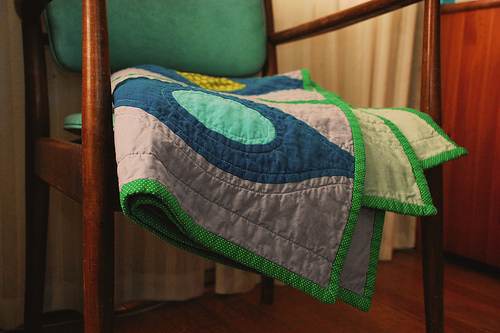
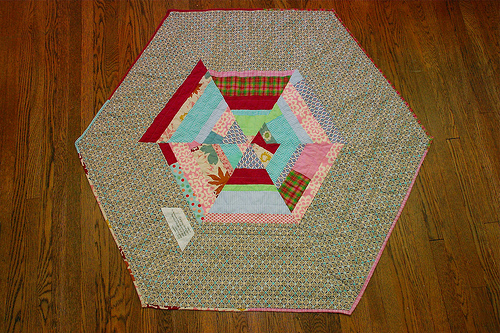
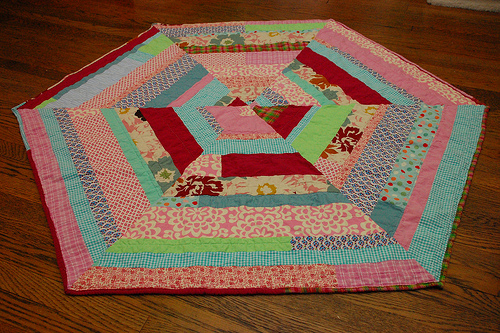
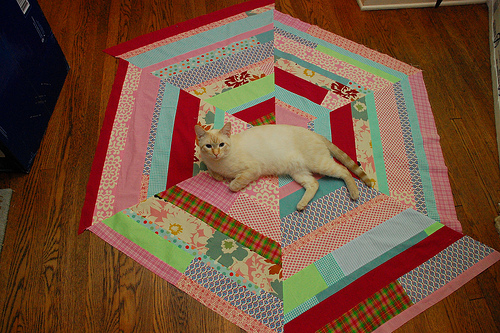
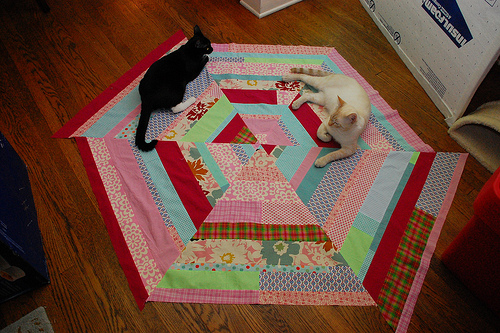
But I have finished a Christmas quilt top that is more my style, using my Mod Beads pattern.  As I was designing it I knew it would make a great Christmas quilt and I can't wait to finish it up to show you.

DSC_0047

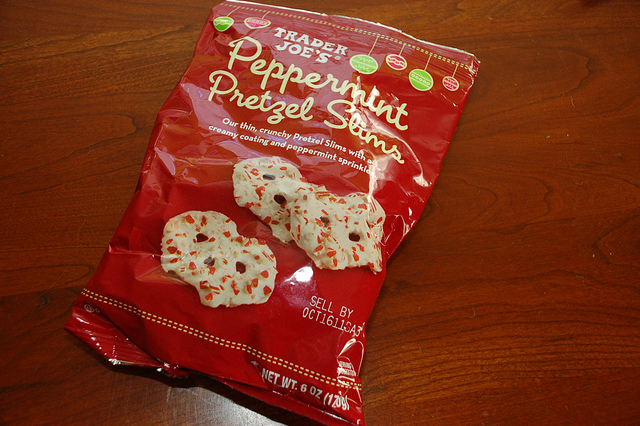
And last but not least, if you live near a Trader Joe's go buy these right now.  They are so good.  I'm a real sucker for seasonal treats and these babies do not disappoint.

Wednesday, November 24, 2010

Monday, November 22, 2010

Grand Opening

The day has finally arrived.  I am so excited to announce the (not so) grand opening of the official Lady Harvatine shop!  The only reason it's "not so" grand is because I don't have many wares to offer you at this point.  Technically only one ware.  But it's a grand ware in and of itself and I have many more grand things in the works!

The Mod Beads Lap Quilt

This pattern is for a 45" x 60" quilt with suggested layouts and fabric requirements for making twin, full/queen and king sized quilts.

The pattern relies on templates to cut out the pieces.  There are curves and you may find curves scary but you shouldn't!  Trust me, they are not so bad.  In fact, I find them incredibly satisfying and fun.  There's something pretty awesome about fitting two curved pieces together and getting a nice flat seam.  It's like piecing a puzzle! 
I would say this pattern is suitable for a slightly advanced beginning quilter.  There is nothing too difficult in the pattern but I do assume you know the most basic basics of quilt making.

The pattern does however teach you to use Dale Fleming's 6-minute circle technique which I absolutely love and has really inspired the whole curved piecing kick that I've been on lately.  Again, sewing circles (or ovals in this case) may seem scary but DO NOT BE SCARED!  You can do it, I promise.

This is a PDF file that you will be able to download after purchasing, not a physical printed pattern.  You must be able to print out the template pages so you must have access to a printer.  By purchasing this pattern you have the right to use it for yourself only.  Please be nice and don't email it around or print out copies for all of your friends.  Thank you!

Visit the shop here!

Friday, November 19, 2010

New Helper

Cringer is ready to make a Christmas quilt.

But I think we'll have to wait until after Thanksgiving.

PS Be sure to check back Monday for the grand opening of the new and improved Lady Harvatine shop!  There may only be one pattern in it to start but it's a good one!

Wednesday, November 17, 2010

First of many.

Hopefully. I guess I shouldn't count my chickens.
First Dress!

This is the first article of handmade baby clothes I've made for my little baby. The pattern is the Puppet Show Dress from Oliver + S. Very sweet and a really good pattern.
First Dress!

This fabric is what inspired the colors for the baby's room. The gold/red/turquoise combination accidentally popped up in an outfit I was wearing not long after making this dress. I was thinking about how much I liked it and then realized where I had seen the exact same combo. I'm really not into stereotypical baby themes like pastels or pink for girls/blue for boys. I think this palette is fun and playful but not super baby-ish. The walls will be a nice gold color with red gingham curtains and accents of turquoise. Not that any work has been done at this point but we'll get to that.
First Dress!

I also made a little pair of bloomers to match. This pattern is from Simple Sewing for Baby by Lotta Jansdotter.

 Oh yeah, did I not mention?  We're having a girl!

Monday, November 15, 2010

For sale next Monday...

The first ever, bonafide Lady Harvatine quilt pattern for sale in my brand new shop!  Here's a little sneaky peak.
Sneak Peak

Check back here on Monday (November 22, 2010) for more pictures and a link to the shop.

As part of my transition from animator to giant pregnant lady to mom, I'm putting a concerted effort into designing and selling my quilt patterns.  I hope to have lots more to offer you in the very near future!

Friday, November 12, 2010

Number 6

Last weekend Harv and I celebrated our sixth anniversary.  Very exciting, especially because this is our last anniversary without child.  Yipes!  We celebrated a little early with a trip through New England in October so on Saturday we just had a nice breakfast out and a delicious dinner at home.
We like to keep anniversary gifts as homemade as possible.  This year Harv gave me an iPhoto book of wedding pictures (we're a little behind with that) and I made him a cowboy shirt.
6th Anniversary Shirt

This is the fourth shirt I've made for him, second anniversary shirt.  I asked if it was lame that I keep giving him the same thing but he assures me he loves it.  Cowboy shirts are practically Harv's uniform (that and Packers t-shirts, blech) and the ones I've made for him get pretty heavy rotation.  Someday I'll have to do a retrospective on Harv's handmade shirts.
6th Anniversary Shirt

This pattern is a vintage one I picked up at a thrift store a while ago.  I've used it three times, tweaking a little bit with each shirt.  The original collar was HUGE (the pattern is from the '70's) so I took that down a little bit.
6th Anniversary Shirt

I also added a front yoke, something Harv asked for the last time I made this pattern without even knowing what it was called.
6th Anniversary Shirt

And I modified the back yoke.  The one in the pattern is straight across so I made it a little more fun.
The fabric Harv picked himself at Michael Levine and I have one of those hand held snap presses and a pretty good supply of pearl snaps on hand for making these babies.

Wednesday, November 10, 2010

Hexagon Baby Quilt

This quilt was made for my friend Katie's baby girl to be.  Katie is the treasurer of the LA Modern Quilt Guild and her baby is due about 3 weeks before mine.  We're both planning to bring our new babies to the guild's weekend retreat in Lake Arrowhead this February.  I'll let you know how that goes!
Hexagon Baby Quilt

The pattern I started out with was the Sixth Times a Charm Crib Quilt from Anna Maria Horner's "Handmade Beginnings".  I initially planned to follow the pattern for a rectangular baby quilt but that didn't work out so well.  I'll get into that later.
Hexagon Baby Quilt Back

The back used pieces leftover from the top (there were a lot of these).
Hexagon Quilt Label

And the label was made using the window "lightbox" method I've used before with a Micron pen.
Hexagon Baby Quilt

Now, time for some real talk.  I dig this design.  It's a great all over pattern and comes together relatively fast and easily.  BUT, and this is a big but, I've got some major issues with the written pattern itself.

First, she doesn't tell you how much fabric you need for the quilt top.  I'd call that unacceptable.  I understand that the nature of this design makes it really hard to give an exact measurement (the number of fabrics, width of strips you're cutting etc. are all left up to you) but you really need a ballpark figure.  Not cool.

Second, by following these instructions you waste a TON of fabric.  This may be no big deal for Anna Maria but it's a huge deal for me.  I hate to waste anything and I love quilt patterns that use clever tricks to better use your yardage.  I used some of the scraps for the back of the quilt but there were still a ton left over.

The third and biggest problem I had with this pattern was some of the measurements were just wrong.  I got really mad at myself halfway through the process for not realizing the mistakes before I started.  I sort of skimmed the pattern but didn't really let the numbers sink in.  We're talking pretty basic geometry here people.  Did you know I have a degree in math?  It's true.  I should have known better.
DSC_0047
So here's the main problem.  She asks you to sew together strips of fabric to make a rectangle that is 60" by 30".  From this you're supposed to cut triangles that are 30" tall.  As you can see in the diagram above, she asks you to fold the fabric over 15" then use a 60 degree triangle ruler (I just used my regular clear ruler, it has a 60 degree line on it) to cut a triangle that is 30" wide.  Now, before I really read through the instructions I thought "How clever!  You cut three triangles with a width of 30" each from a rectangle that's 60" wide."  Do you see the problem here?  An equilateral triangle (that's what we're going for here) that has a 30" side is not going to be 30" tall.
DSC_0001
If you cut the way the instructions tell you to, by folding over 15", you'll end up with a triangle that's about 26" tall.  And the pattern makes it very clear that you want your triangle to be 30" tall.
DSC_0046
This was the point when I started to get angry.  Above you can see my mid-sewing calculations.  To get a triangle that is 30" tall, you have to fold over about 18" of you're rectangle and that means it's not so clever and you're not going to get 3 triangles out of the 60" rectangle, you'll only get two.  And THAT means, BIG TIME WASTE OF FABRIC.
Now, to be fair the instructions only tell you to cut 2 triangles from each 60" x 30" rectangle.  But that leads me to think they knew they were off with they're calculations, they just didn't bother to figure out what that number should be instead of 15". 
You're asked to make two 60" x 30" rectangles to get four 30" tall triangles, then one 60" x 27" rectangle to get two 27" tall triangles.  You sew these together and do some trimming (a lot more wasted fabric) to get the rectangular crib sized quilt in the book.  Well, because of the miscalculations and confusion I would have had to cut more strips, sew another rectangle and waste more fabric to get the 6 triangles I needed.  Instead, I just cut six 27" tall triangles and left the thing a hexagon, more of a play mat than a crib quilt.

If I were to do this again, or if you were to attempt this quilt, this is the technique I would use.  Instead of sewing together 60" strips to make a rectangle, I would cut strips that were at least 36" long (a little longer would just give you a safety net), trim the end of each strip at a 60 degree angle and then sew them together into a 30" tall parallelogram like so.
DSC_0048
You make three of these and cut into six 30" tall triangles to make a hexagon like mine, or make two 30" and one 27" to make the original rectangular crib quilt design.  And your heart will be glad that you didn't waste any fabric!

Monday, November 08, 2010

Introducing

No, no baby yet.
Sadly, we had to say goodbye to our sweet cat Lillian back in August.  She was 15 years old and had some sort of cancer in her liver.  I had Lilly since she was a kitten and I was 15 years old myself!  She was a laid back cat who did what she wanted and wasn't bothered by what was going on around her.  She just did her thing.  It was so hard to see her go and even months later I can't believe she's not here anymore.
Photo Hog
Lilly left a real hole in our little family and while she can certainly never be replaced, it felt very empty having only one cat in the house.  So...
In the grand tradition...
We got two more!  Meet Marmee and Cringer.  We adopted them from a pet fair that happens near our house about once a month.  They came from two different shelters but get along swimmingly (though that was not the case at first).
Marmee!
Marmee is so named because a) I love "Little Women" and b) she was pregnant when she arrived at the shelter but they took her babies when they spayed her.  I guess that's a pretty standard policy at shelters and it makes sense but I still felt so bad for her!  Though now that I've gotten to know her she seems a little immature to be a mother.
In the grand tradition...
Cringer's name comes from "He-Man".  Harv's choice, not mine but it certainly suits him.  He's easily spooked but so sweet and curious that his fears never keep him away for long.
In the grand tradition...
And of course, in the grand tradition of cats and quilts, these two made a beeline for this quilt top the second it hit the ground.