After hanging my lovely new kitchen curtains, my eyes fell upon the sad, ragged, always dingy kitchen rug. It simply would not do.
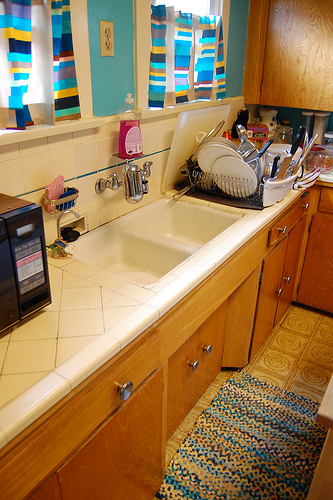
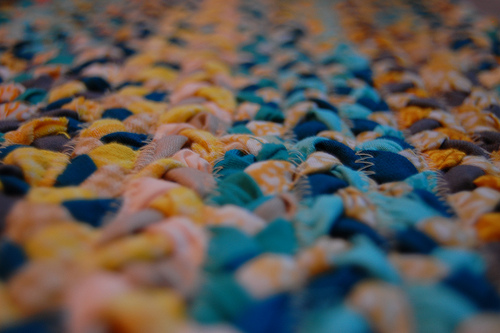
This rug is made from curtain scraps and fabrics chosen to match, all of which I had on hand. The fabric was cut in two inch wide strips and braided together. When I reached the end of a strip I just added a new one, overlapping about an inch.

When I had a lot of braid, I started sewing rows together, using the zig-zag stitch on my machine. My rows are 21" wide. I sewed almost to the end of the braid and needed more so I kept braiding.
Some tips if you want to try making your own rug:
- This is a super way to use up fabric that you don't really like. As long as the colors work, the pattern is indistinguishable once it's braided.
- Never have a made something more conducive to watching movie upon movie while working. This takes .2% concentration.
- You may have to lift your presser foot to get the rug underneath. I didn't even know that was possible until making this rug!
- Speaking of presser foots (feet? No, foots), after lifting it and cramming your rug underneath it, you may forget to then lower the presser foot lever as the foot itself already appears to be down. Do not be fooled! You must still lower the lever for if you do not you will encounter (seemingly)inexplicable tangled mess after tangled mess. Not that it happened to me. No no. I just heard that it could happen. From my friend. Biz.
Part 3 of 3 tomorrow, I swear! And man is it the best of all parts!
Looks really cute. Do you need to work with particularly long pieces, or can you just add in as you go?
ReplyDeleteYou called it a Half-assed tutorial - too funny! LOVE this rug, you're a stinkin' genius, seriously! How do you come up with these things! Looking forward to part 3 :-)
ReplyDeleteWhat a cool rug! I definitely want to try this project out in my house. It looks like a great way to use up fabric scraps
ReplyDeleteIt is beautiful! I would love to make one of these...
ReplyDeleteRima
www.yarnydays.com
The pieces weren't all long. It just depended on the fabric I was using. Long pieces are handy because you don't have to add new ones as often but having at least one shorter piece at a time helps keep things from getting tangled.
ReplyDeleteI'm not usually a fan of yellow, but I'm loving how all of the textile art you're producing is turning out! May have to rethink my apathy towards that part of the colour wheel.
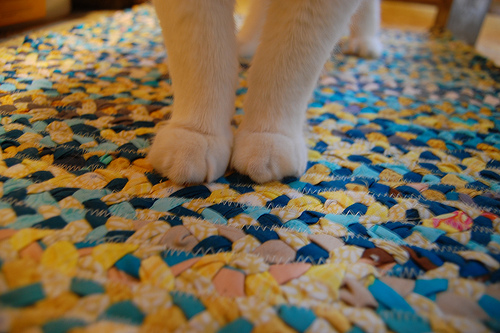
ReplyDeleteThat is gorgeous! And I love, love, LOVE the photo with the paws!
ReplyDeleteGreat stuff here, stalking, er, following your blog now..
ReplyDeleteRegards,
Can't wait to see the next step! Think I might try my hand at one of those rugs...it's a good project for a perfectionist crafter with a Martha Stewart controlling streak and an 8 yr old daughter always wanting to craft together...lol.
ReplyDeleteOk the paws picture is too much. love it! and your curtains are fab too.
ReplyDelete