You will need:
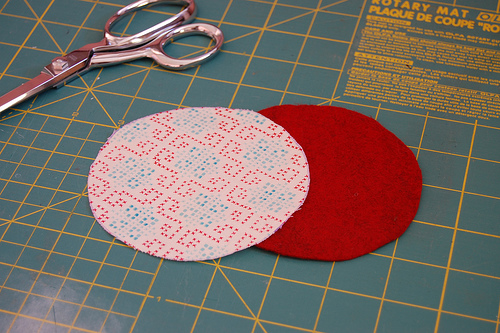
- a 5 inch square of cotton fabric for the outside of your cookie
- a 5 inch square of felt for the inside
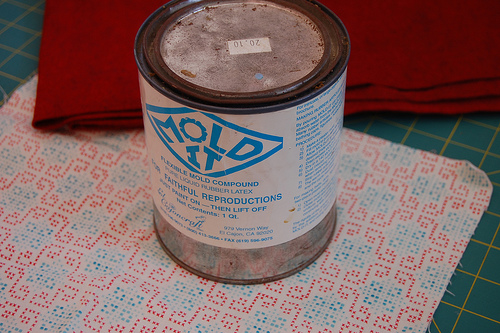
- a circle to trace, one with a diameter of about 4.5 inches (I use an old paint can)
- pinking shears
- a slip of paper, about .5" by 2.5" for your fortune
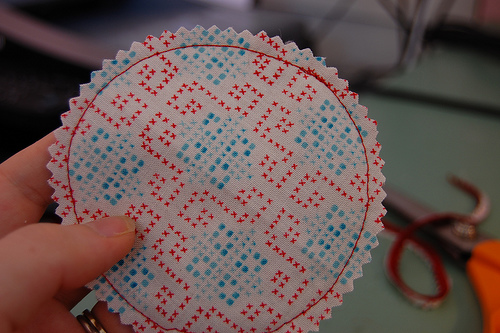
Cut both circles out.
Lay the cotton on top of the felt, right side up, and line up the edges. Sew a half inch seam around the entire circle. I use my walking foot for this but you don't have to.
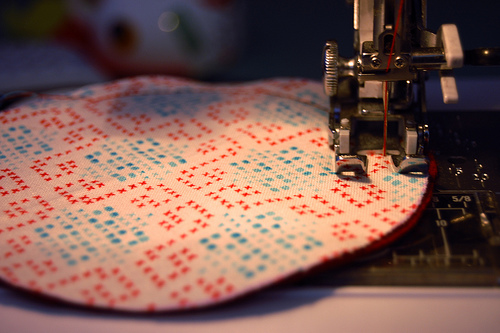
Use your pinking shears to trim the raw edge all the way around the circle, leaving about a quarter inch of fabric.
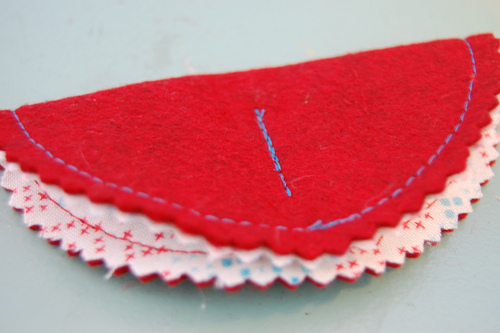
Fold the circle in half with the cotton side together, felt on the outside. Sew about an inch seam down the middle, not sewing to the edge of either side of the half circle. Be sure to back stitch a few times.
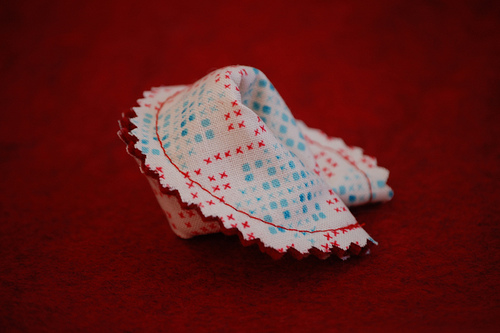
Flip the cookie open and adjust the folds until it looks right.
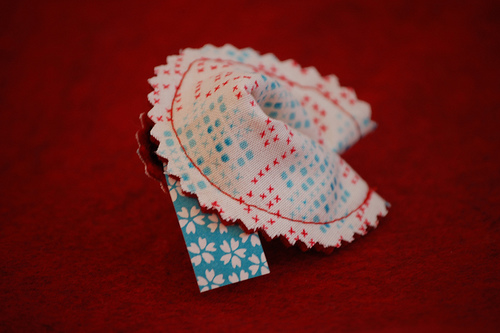
Before you give it to someone be sure to write a fortune on a slip of paper and stick it inside. I like to use pretty origami paper that is blank on the back.
You can also string a piece of ribbon through the center of the cookie and tie it to a gift, like so.
Ok, the end, happy cookie making!
What an absolutely wonderful idea! Thanks so much for this tutorial I'll have to give it a try for mother's day :-)
ReplyDeletethis is adorable! Thanks for posting the tutorial. I'll definitely be making a few of these soon :)
ReplyDeleteI love it! Great tutorial!
ReplyDeleteI love this... thank you! Thank you!
ReplyDeleteRemembering my vow of last December, I really should start whipping these out now... just in time for Christmas!
Great tutorial - thanks! These are really cute~!
ReplyDeleteDelightful project, perfect instructions. Thanks, and to heck with those contests anyway.
ReplyDeleteThese are so adorable. I love the idea of making them as little gift tie-ons.
ReplyDeleteThanks for another wonderful project!
ReplyDeleteThanks for this. It is great. Will be trying it out soon.
ReplyDeleteI was wondering how you did that! I had to look at the picture for a few minutes to figure out how the flipping works but now I see... Thanks!!
ReplyDeleteTotally adorable, and what a great idea!
ReplyDeleteThat is such a great idea! I have to try this today. Thank you very much for that tutorial!
ReplyDeleteThat is just adorable!! Thank you for the instructions. :)
ReplyDeleteLiane
http://www.spacestitch.wordpress.com
Thanks for the great tutorial. I'm thinking these may make an appearance as place cards at our next Chinese New Year's party!
ReplyDeletenow that is just TOO cute!
ReplyDeleteWow I love this! They're so cute! Thanks for the tutorial!
ReplyDeleteThank you SO much for this! I want to do something special for my customers and this is just the thing!
ReplyDeleteI love how quilters share their knowledge, thanks for the half-p assed tutorial, it works,lol.
ReplyDeleteRoslyn
i love it! thanks for the tutorial! it's so simple. i can't wait to try it!
ReplyDeleteI refound this post! Over Christmas holidays, I went home and made my sisters (11 and 6) at least twenty of these! They loved them (they like to play restaurant) and they were so easy to make! And aren't those the best kinds of gifts-- the ones with little effort but a huge payoff?
ReplyDeleteThanks for the tutorial, and I've shown one of my friends, who loves it as well!
These are so cool! I think I'll make some out of the scraps I have for my wedding favors. Thanks for posting!
ReplyDeleteI love it! Seen it before on the website of Martha Stewart. She had a small piece of wire between the two layers (glue or sew in the middle of the circles). Fold the circle in half along the wire and shape the wire like a fortune cookie.
ReplyDeleteWhat a lovely idea! I am always amazed with the things people come up with.
ReplyDeleteI LOVE this tutorial!!! Thank you so much. Here's the cookie that I made!
ReplyDeleteGoing to make these out of Christmas fabric to turn into ornaments. First use them to do our Secret sister name exchange for sorority. Thanks for the great idea.
ReplyDeleteI'm making these as favors for a Chinese dinner to benefit a group from church who are heading to China this summer.
ReplyDeleteThis tutorial is wonderful. Gonna have to make some now. Heck, I might just throw a party so I can send these as invites...
ReplyDeleteThis is absolutely adorable, thank you for the tutorial! I want to make these today but I don't have any felt...will the result be ok if I use two pieces of cotton instead?
ReplyDeletehow adorable! I just found your tutorial from the Project Wedding forums and I'll certainly be using it for my wedding reception in January. Thanks!
ReplyDeleteI don't understand how to "flip open" the cookie. :(
ReplyDeleteThank you so much for this tutorial! I've made ten cookies today and put some new-year-greetings in it! :-)
ReplyDeletehi when i flipped it open it is in fortune cookie shape but is the back side sppose to be open?
ReplyDeleteThank you for the tutorial. Did a riff using fusbile web, 5" squares of fabric, half-round template & pinking rotary cutter. I only had to sew the 1" seam.
ReplyDeleteGreat project! I just wanted to let you know that we featured this project on our Facebook page with almost 12,000 fans. We’d love it if you’d use our Featured Blogger button, available at: http://www.dailycraft.com/thank-you-for-crafting/. Our audience loved the project and we look forward to sharing more from you. Please let us know if you have any questions or projects you’d love us to feature! Thanks!
ReplyDeleteUsing this as a favor for my quilt guild luncheon. so cute!
ReplyDeleteNothing half a..'d about it. This is a great idea, and a well written tut. Thanks.
ReplyDeleteSuper cute! I just reposted you on my blog!
ReplyDeletehttp://www.marrymetampabay.com/weddingdiynosewfortunecookie/
Saw this tutorial early this morning, spent all day trying to set up my mum's old sewing machine and managed to find enough fabric to make two cookies (so far). I love it!! :D Thanks so much for posting!
ReplyDelete