Showing posts with label sewing. Show all posts

Sunday, November 03, 2013

Happy Halloween!

Here's where I show you a million pictures of my cute kids.

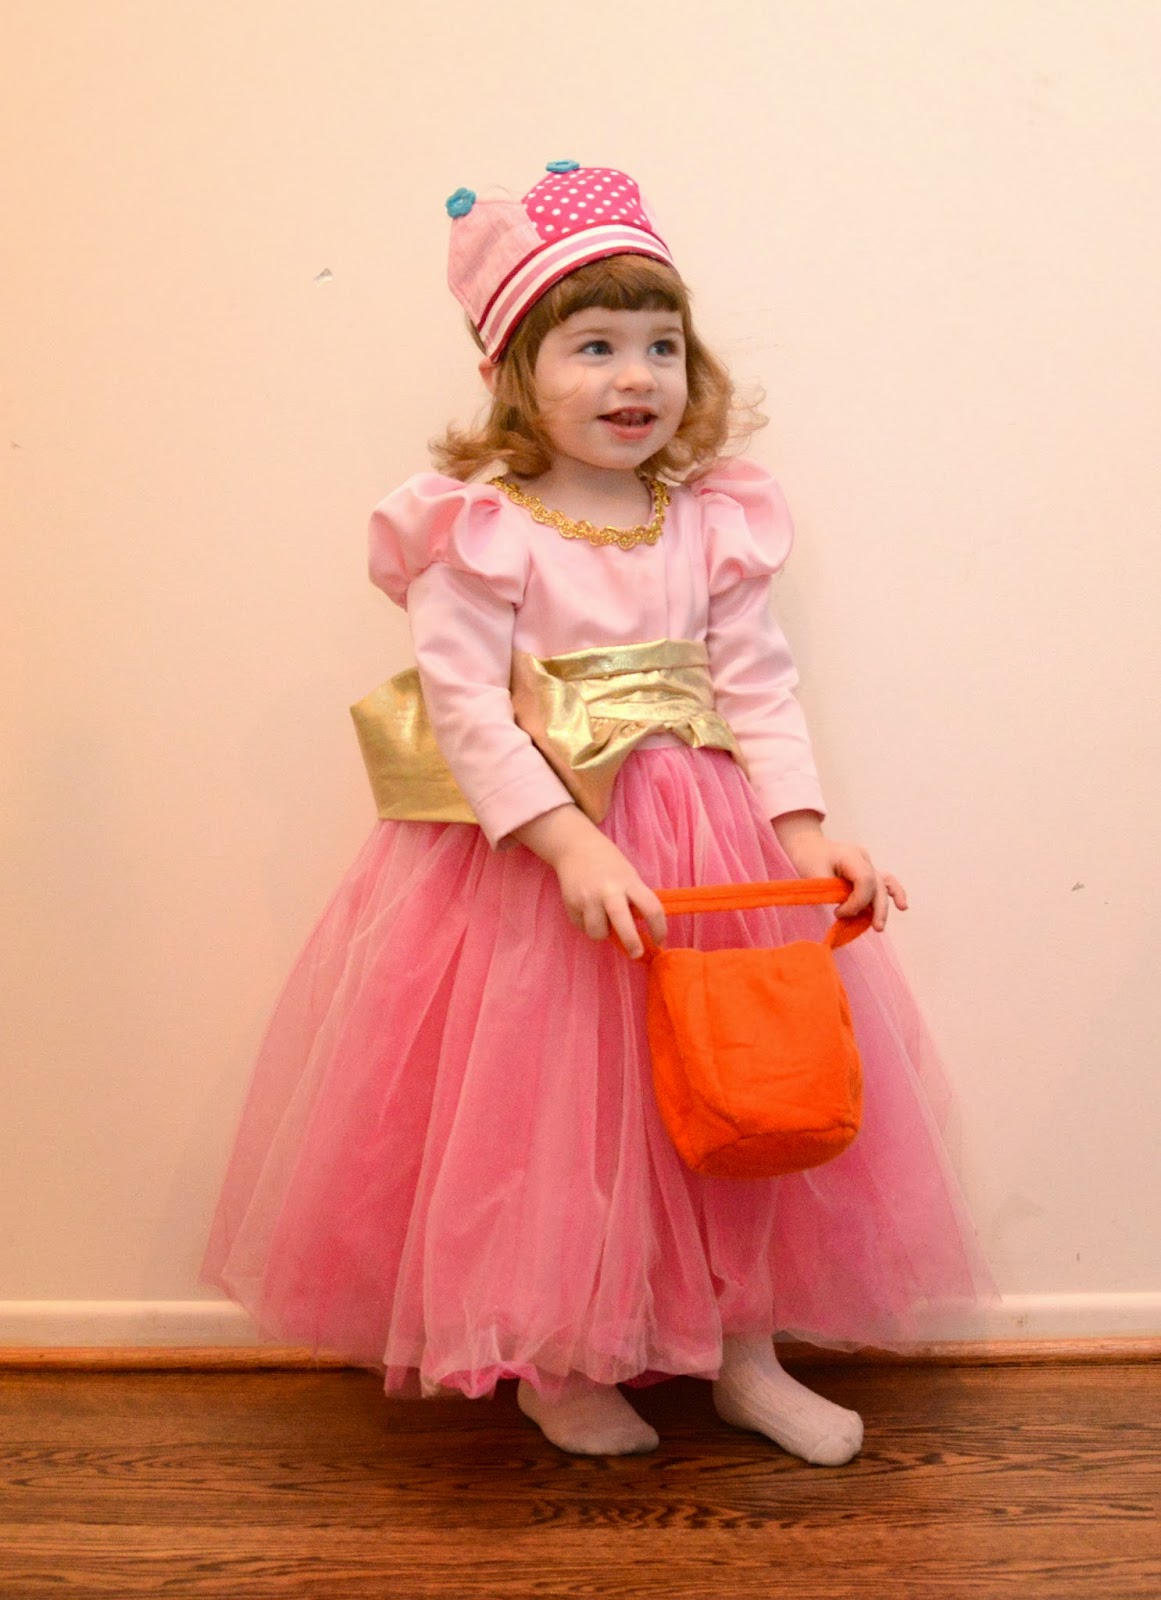
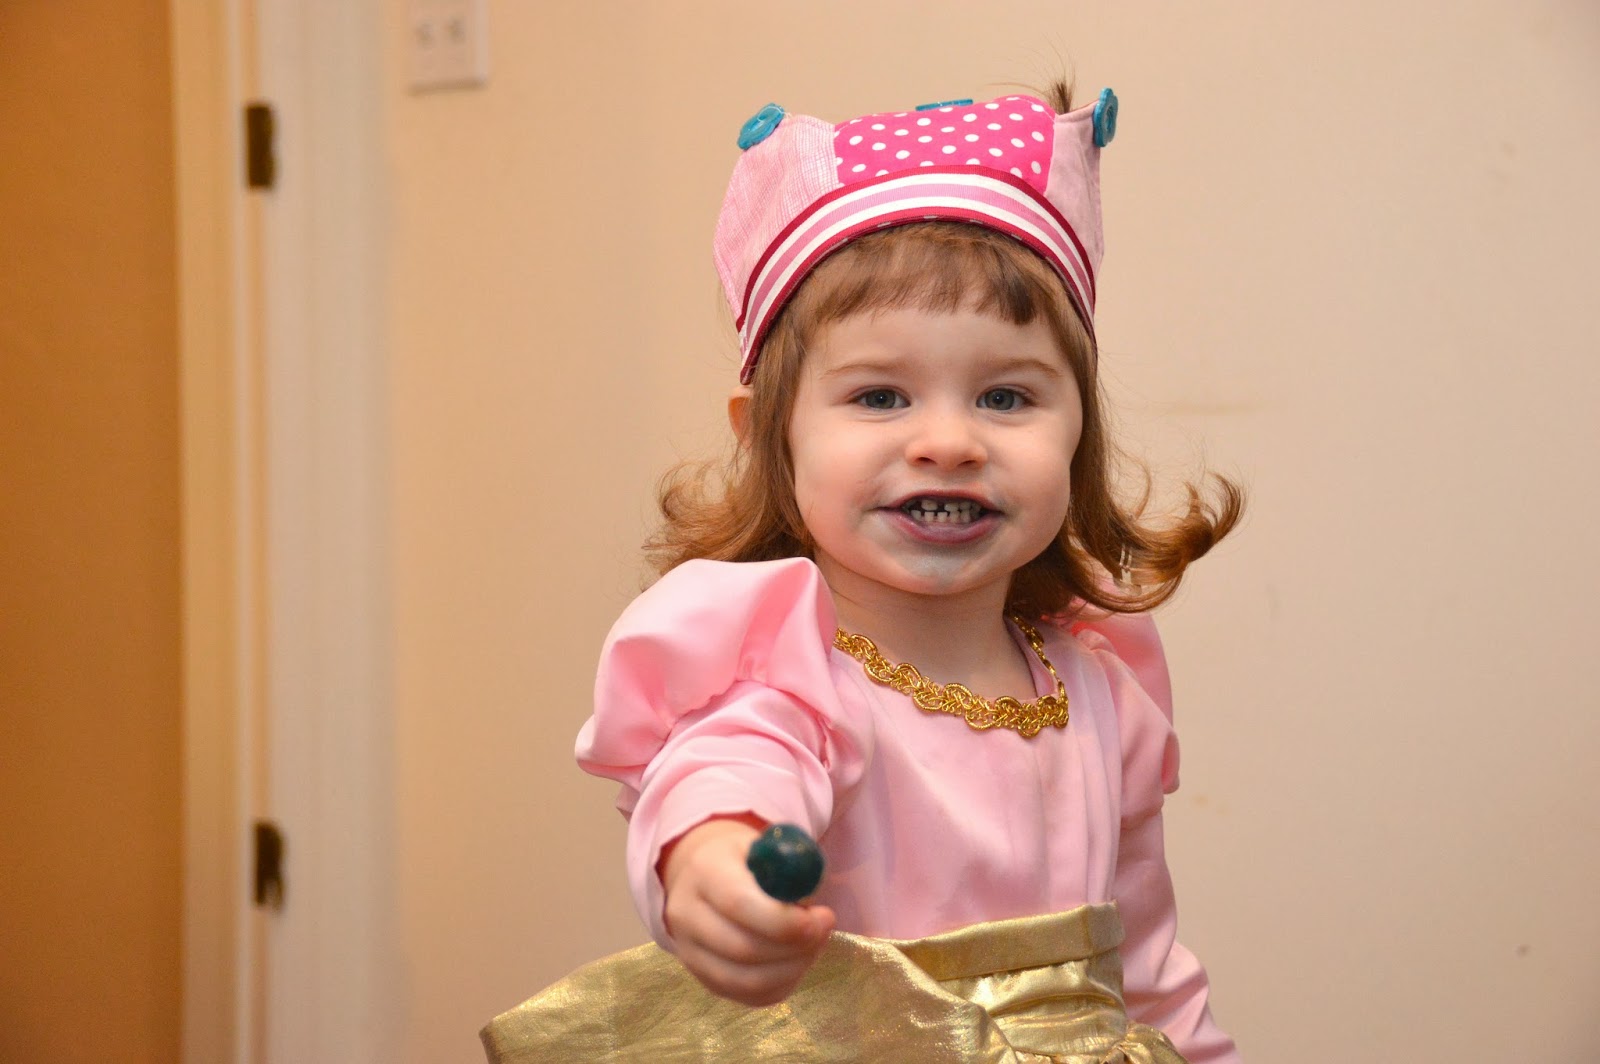
Ginny wanted to be Pink Minnie but when we were looking through the pattern book for a suitable Minnie dress she saw the pattern for this:

"I wear dis dess."
"You don't want to be Pink Minnie?"
"I wear dat dess."


Okay.

Ginny is more than happy for me to sew during the day if I am making something for her.  I told her I would try to finish it after she went to bed and we woke to her crying the next day, trying to get into my sewing room and yelling "I want my dess! I want my dess!"  Needless to say, she's wanted to wear it everyday since. 


The crown was already in her daily dress-up rotation.  In fact, I did a little tutorial for it on Instagram a couple of months ago.  You can find it with the hashtag #easydressupcrown.  (While you're at it, follow me, @ladyharvatine!  There's a lot more sewing and a LOT more baby pics there then there are here these days!)

Teddy was going to go as Pink Mickey to match Gin's Pink Minnie but since that was off the table I went for the obvious costume:
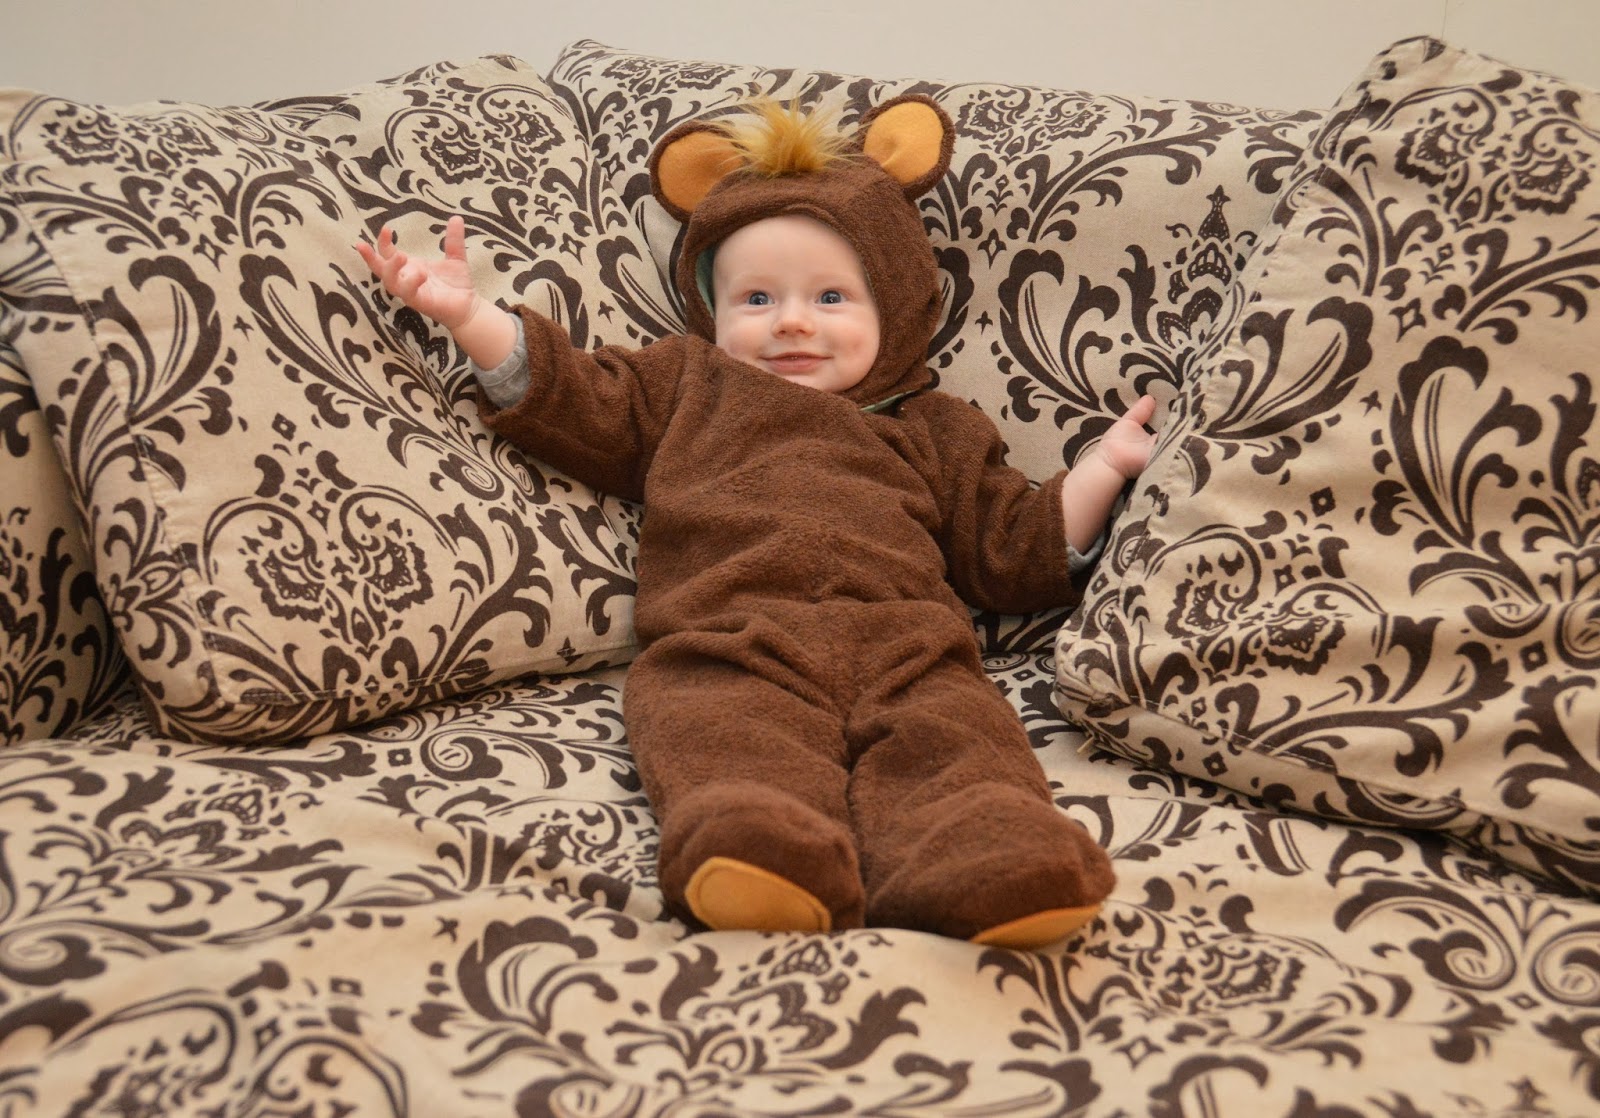

My Teddy Bear!


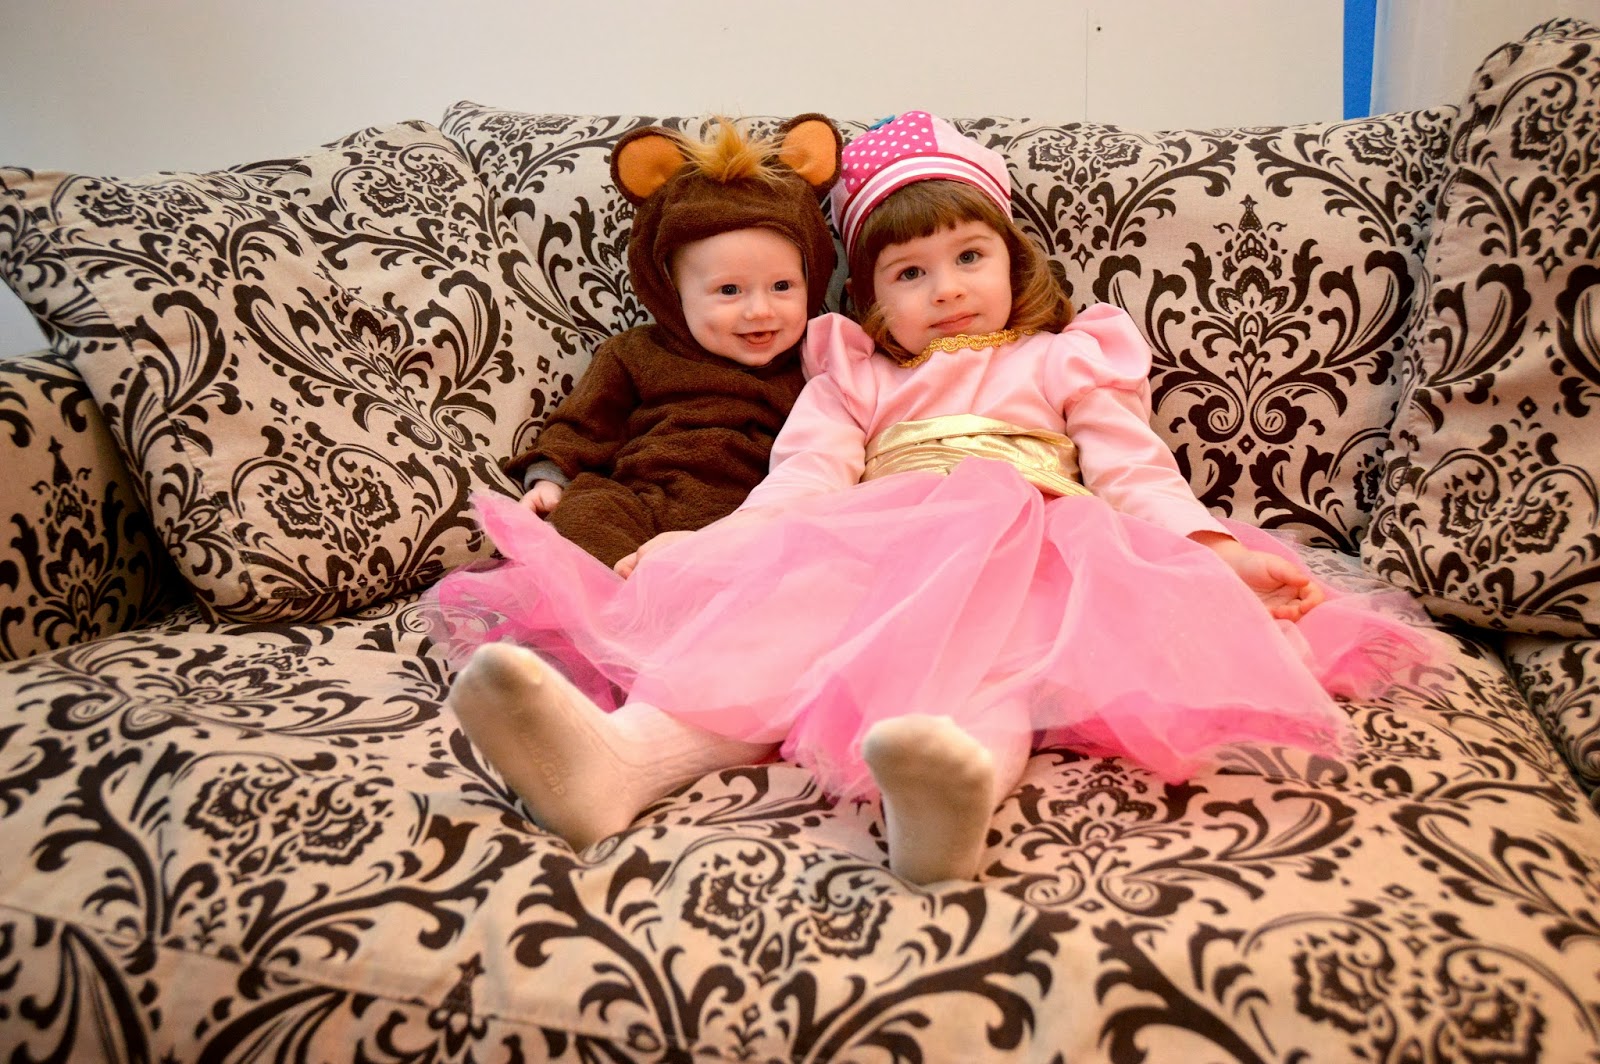
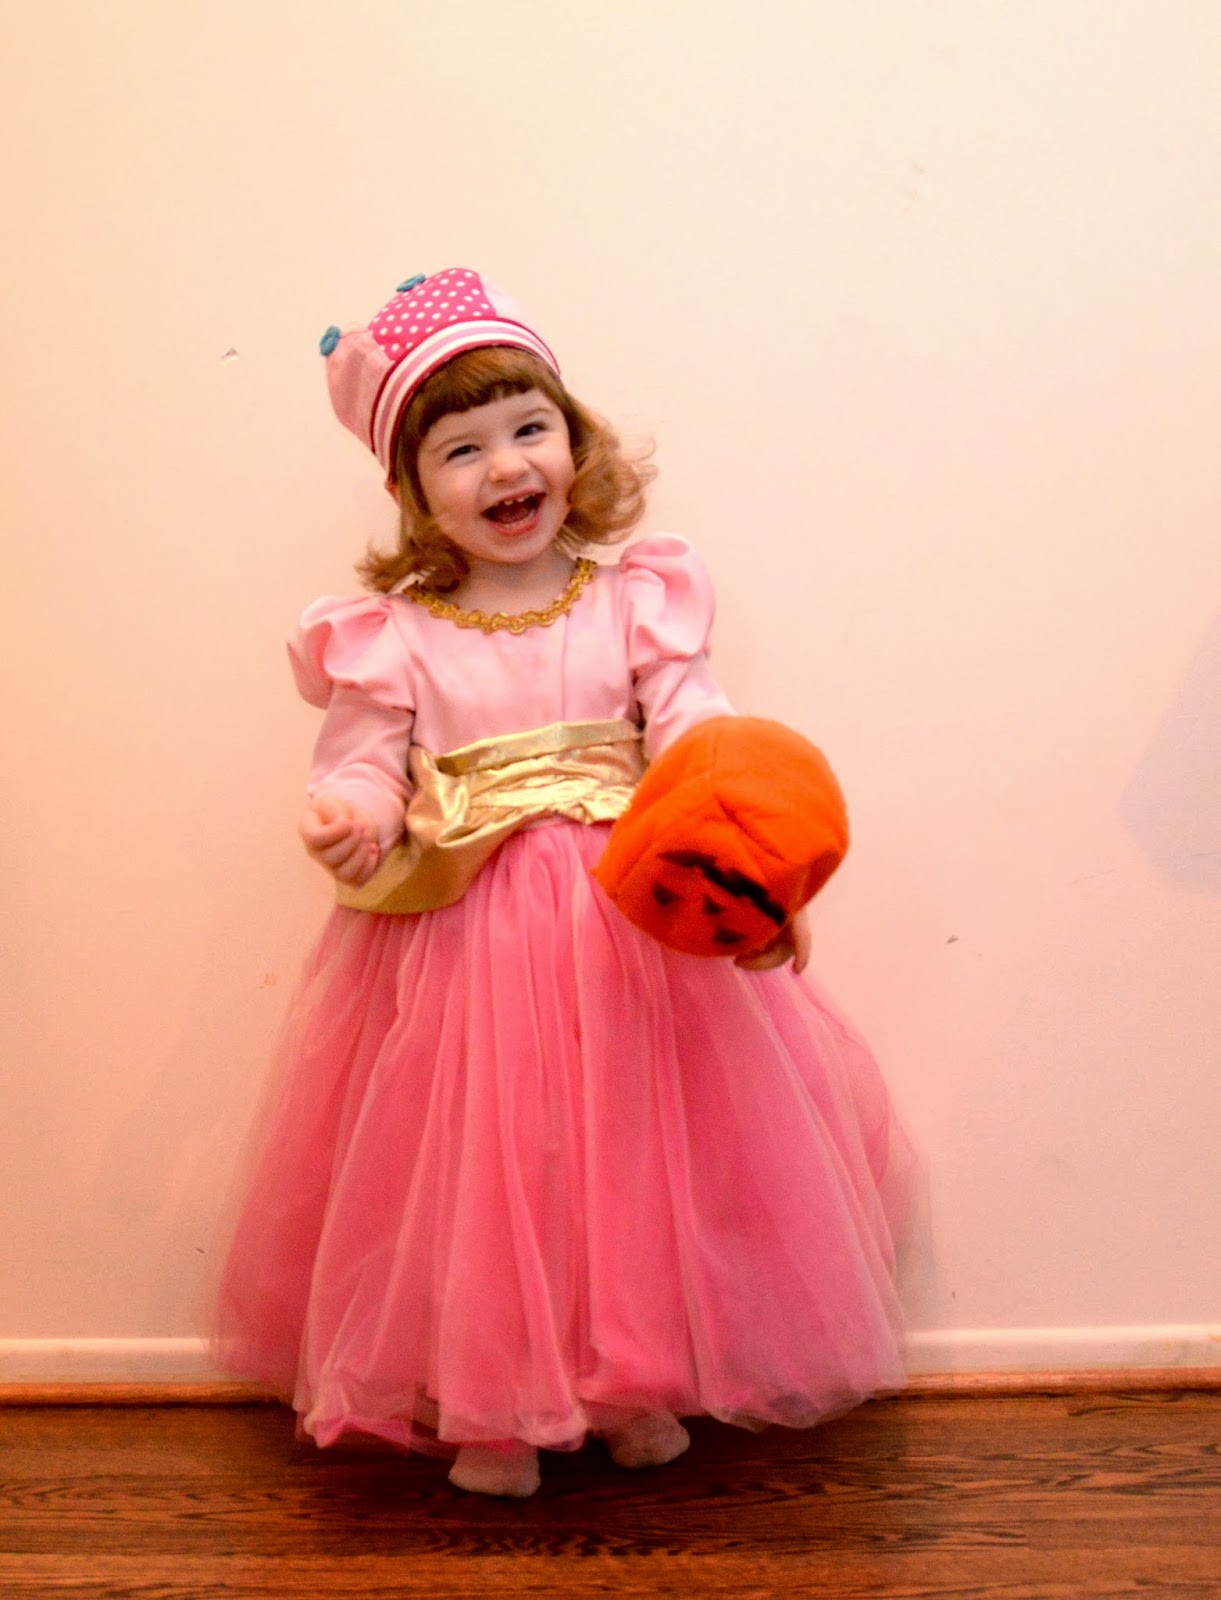
Both of these are Simplicity patterns though I don't have the numbers on hand.  Ginny's was made exactly like the pattern.  Teddy's was more for toddlers so I took in the smallest size.  I also adjusted the placement of the ears a bit, made the ear linings smaller, added the tuft of hair and the little pads to the bottom of his feet.  I also attached the feet to the onesie instead of having separate booties.


Ginny loved trick-or-treating.  Teddy was happy to go along for the ride and was asleep by the time we got home.  Gin proceeded to sample a little bit of a lot of candy.  As you can see she really lived it up.

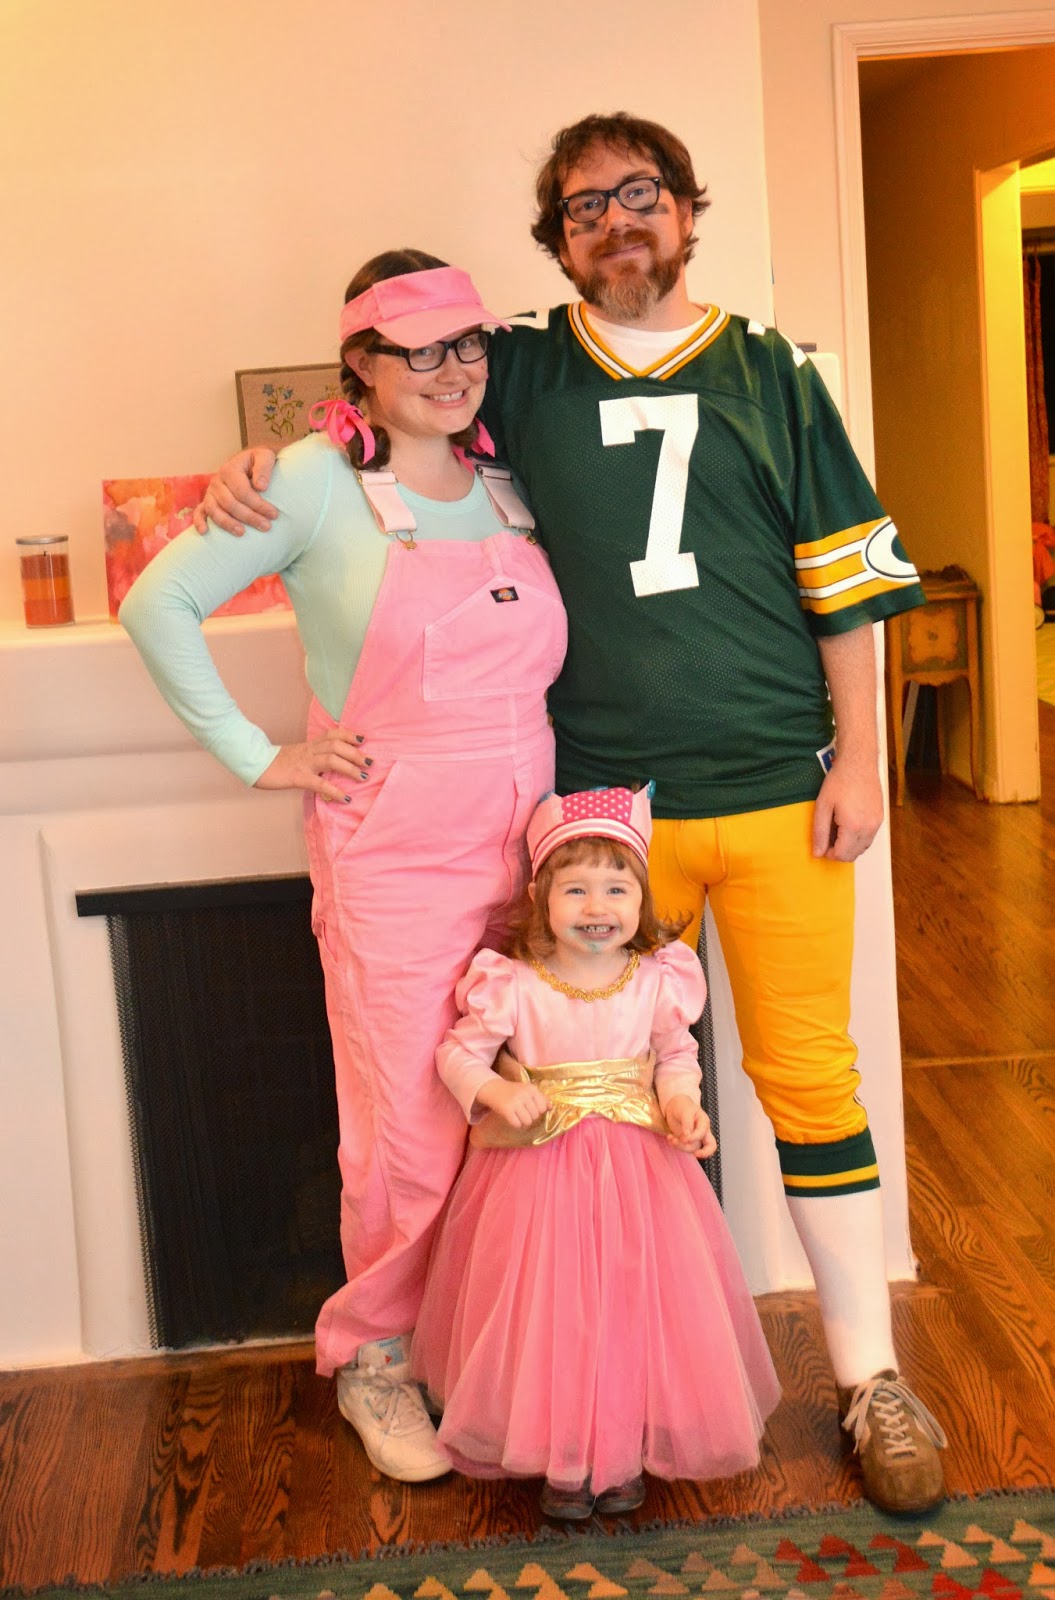
 Harv already owned all of his costume.


 And last (maybe least?), I was Kid Sister in white overalls and a white visor that I found at the thrift store and dyed pink.  I was surprised by how many people remembered My Buddy but had never heard of Kid Sister!


Though we never had either, they definitely have equal billing in my memory (as do their jingles).


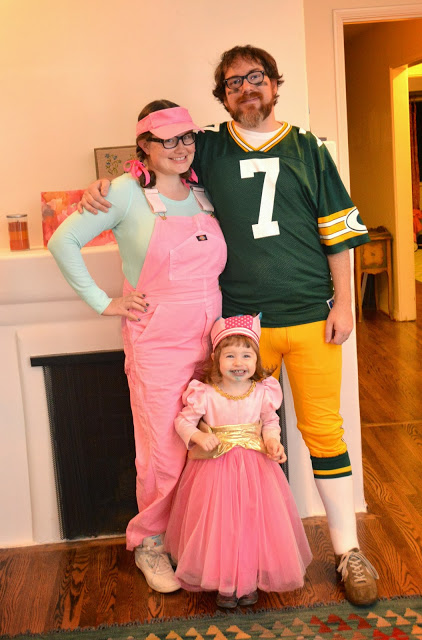
 A disparate group for sure.  Maybe next year we'll do a family costume but I have a feeling if we do it will have to revolve around Gin's whims.  She's a pretty opinionated little girl.

Saturday, November 03, 2012

A Class with Elizabeth Hartman

A little while ago I took a workshop with Elizabeth Hartman at Sew Modern.  We learned two different methods of making letters.

The first was an appliqué technique using fusible webbing.
 We started with pieced fabric and ironed fusible webbing letters onto the back.
 After ironing the letters onto our background fabric we machine appliquéd them using a zig zag stitch.

The VA is for my Virginia, not the state.  I originally intended to turn this into a wall hanging but now I'm not so sure.  I might turn it into a very simple quilt.  Any ideas?

The second technique was a type of paper piecing using freezer paper and Elizabeth's Refrigerator Magnets pattern.  This is a very tedious technique but sometimes I'm in to mood for that sort of thing and it really does turn out great.  It's a good way to piece letters like this without fiddling with lots of tiny pieces.  Plus you have your letters all planned out before hand without having to measure anything.  Unlike traditional paper piecing, which involves sewing fabric to a piece of paper with the pattern printed on it, this freezer paper technique has you cut apart your paper pattern and iron the pieces onto your fabric as you build your block.  The benefits to this technique are that you can reuse your pattern pieces since you're not sewing through them and you can press your seam allowances open which is a very good thing when you're working with such tiny pieces as these.  Not everyone may think that last one is a pro but I'm ALWAYS an open seam presser.  It makes your piecing so much flatter and crisper, and I love the way it looks.
I put this in the back of a quilt that I will share with you soon.

I'm not usually a class kind of lady when it comes to this sort of thing (though I am a classy lady) because I figure I can just teach myself.  Although this is true, when some friends asked me to take the class with them I realized how fun it can be to spend the day sewing with a group of quilters and it's extra cool to spend time with someone like Elizabeth.  Not to mention she was a great teacher.  Also, piecing/appliqueing letters wasn't the sort of thing that I was very interested in attempting before but it was great to branch out a little bit and try something different.  I came home and immediately started thinking about an alphabet quilt for Ginny.  It was a great day and I would definitely recommend a class with Elizabeth to anyone!  

Thursday, March 24, 2011

Squashed Hexagon Pillow

The LA Modern Quilt Guild had a holiday swap back in December and I had to make something for Andrew (maker of this awesome quilt).  He sent me a picture of the curtains he has in his house and I based the colors on that.

Photo by Nicole Ramirez.

The pattern pieces are squashed half hexagons.


I sewed them into rows to end up with pairs of like colored pieces sewn the "right" way (into squashed hexagons) alternating with pieces sewn "backwards" (the hour glass shapes).


I bought the ENORMOUS pillow form at Ikea. It's a great pillow and it only cost (I think) six dollars. I'd call that a steal, as long as you have a need for something so huge in your life. It would make a great floor pillow.

Wednesday, March 24, 2010

Hexagonia

It's a disease.  Where you just want to sew hexagons.  I think a lot of people have it.  I don't.

At least I didn't until I figured out a way to piece hexagons with my machine as opposed to fiddly little English paper piecing.  Hand piecing is just not for me.  I've tried it, it's ok, I just can't keep it up for the long haul.
And so:
Machine Pieced Hexagons
This is a Bee block for the queen of solids, Latifah, of LAMQG fame.

Would you like to try?  If so, I've got some treats for you!

Number 1, presenting the first ever Lady Harvatine instructional video:


I'm sorry that things aren't totally in focus the entire time.  I'll do better next time.

Treat number two is a pdf file of hexagon templates.  You can print and cut out 4", 3" and 2" hexagons, all with a 1/4" seam allowance included.

Download the pdf file here.

I hope the video is clear enough.  Please ignore my horribly ragged finger nails.
Let me know if you have any questions!

Friday, March 05, 2010

Harvamade iPod Sleeve

Harv has been asking for a homemade iPod case for a while now.
More Sewing
I suggested that he make one himself, with my guidance of course.
He did it.
Here you have a simply made, zippered, lined pocket expressly made for his iPod.
Good Job Harv!
Look how proud.
He has told me many many times since making it how much he likes it.  It's the little things, folks.  Especially with this guy.

Monday, February 08, 2010

This might be cheating

This mini-quilt is for a Valentine swap at tonight's LA Modern Quilt Guild meeting. I don't know if I should be sharing this yet as it's supposed to be a blind swap but, well...I guess I don't care.
Valentine Mini Quilt
Truth be told, I painted our bedroom last week and I am tempted to spend the entire day in my pretty new, non-hell pit room. Blogging is a perfect bedbound activity.
Valentine Mini Quilt
The quilt is tiny; about 9" x 12". The technique I used to make the hearts is a variation of this circle technique. The biggest difference is that I didn't sew the pieces together until I quilted it. I left them glued together and then quilted around each heart.
Valentine Mini Quilt
The label in the back is the same kind of deal. I didn't think I'd be able to match the hearts on the front and back perfectly so I didn't try. It would be a great look if I could pull it off though. Maybe next time.
Valentine Mini Quilt
Also, rounded corners! I love them.
Valentine Mini Quilt

Monday, February 01, 2010

Monday, September 14, 2009

New Addition (Part 2 of 3)

Ok, it's not Friday as originally promised but you've probably come to expect such tardiness from me.
After hanging my lovely new kitchen curtains, my eyes fell upon the sad, ragged, always dingy kitchen rug. It simply would not do.

This rug is made from curtain scraps and fabrics chosen to match, all of which I had on hand. The fabric was cut in two inch wide strips and braided together. When I reached the end of a strip I just added a new one, overlapping about an inch.

When I had a lot of braid, I started sewing rows together, using the zig-zag stitch on my machine. My rows are 21" wide. I sewed almost to the end of the braid and needed more so I kept braiding.

Some tips if you want to try making your own rug:
  1. This is a super way to use up fabric that you don't really like. As long as the colors work, the pattern is indistinguishable once it's braided.
  2. Never have a made something more conducive to watching movie upon movie while working. This takes .2% concentration.
  3. You may have to lift your presser foot to get the rug underneath. I didn't even know that was possible until making this rug!
  4. Speaking of presser foots (feet? No, foots), after lifting it and cramming your rug underneath it, you may forget to then lower the presser foot lever as the foot itself already appears to be down. Do not be fooled! You must still lower the lever for if you do not you will encounter (seemingly)inexplicable tangled mess after tangled mess. Not that it happened to me. No no. I just heard that it could happen. From my friend. Biz.

Part 3 of 3 tomorrow, I swear! And man is it the best of all parts!

Wednesday, September 09, 2009

New Addition Part 1 of 3

Intriguing, eh?
As I am the #1 cook in the house, Harv is automatically the #1 dishwasher. We both work fairly late which means dinner is late and Harv is often doing dishes at 10:30 at night. We haven't had curtains in the kitchen since we moved into our house 3 years ago and he gets a little creeped out being in there so late, knowing the neighbors and any creatures of the night could be watching him.

We bought this fabric a long time ago, I believe when the line first came out. It's from Anna Maria Horner's Drawing Room collection. The colors couldn't be more perfect in our kitchen.
It took me some time to get motivated to actually make the curtains. I wanted cafe style but I didn't want to just make a sleeve at the top of the curtain. Instead I sewed equally spaced tabs to the backs, copying some Ikea curtains I bought recently.

I chose the kitchen wall color before we moved in and have always been a little unsure about it. It just seemed like it was a little too much. The yellow Kitchen-Aid balances things a little but I think adding the curtains really ties everything together. Now, I love the wall color. It works.

So, here's a little sneak peek at part 2, coming Friday. You're all pretty smart, I'm sure you can guess what it is. Part 3 on the other hand, hoo-boy! It's a doozy. You'll just have to wait and see.

Saturday, July 18, 2009

Stacked Coins

This quilt was given to two friends who got married a couple of weeks ago. The pattern is certainly nothing new. Not that I know anything about the history of stacked coin quilts of course. They're Amish maybe? This one was inspired by the pattern in Last-Minute Patchwork and Quilted Gifts though I didn't actually follow the pattern.

The book asks you to cut strips with scissors to get a "wonky" look to your coins. I'm all for irregularity but I'm not totally digging the wonkiness these days. So instead, I cut strips of different widths using a rotary cutter.

This is the first quilt I've made using 100% linen (the closest I've come is this one with a cotton/linen blend). I've got to say I absolutely love the way it turned out! It's so soft and drapes beautifully. It's a little trickier to use than 100% cotton because it shifts so easily. You could do a lot of pinning to combat this. I try to pin as little as possible though so instead I used spray starch when I ironed the prewashed fabric. This technique worked great.

I made my own spray by mixing 2 tablespoons of cornstarch with 2 cup of water in a spray bottle. This mixture does leave a white residue on the fabric but it didn't matter to me since I would wash the quilt before giving it away. I've read that if you boil the ingredients together instead of just mixing this won't happen but I can't say whether that's true or not.

The colors of the quilt were inspired by the wedding invitations. I magically had everything I needed to make this quilt on hand. I don't think I have ever done that before! The two solid blue/green fabrics are what's left of my Kaffe Fassett shot cotton. In these colors at least. And I still have scraps. I just love it so much! I want all of this fabric to be mine!

And of course, there has to be a matching card.

Monday, June 01, 2009

Broken Lines

I haven't had much time to sew lately but I really wanted to make some sort of quilt for my friends Sarah and Olivier's baby shower. They are the couple that I made these table runners for last year. Now they are expecting their first baby, a boy.

This quilt was designed to be completed in the limited time I had available this week. It's super simple but my taste usually tends toward simple anyway.

I love the way this turned out. The colors are so pretty. As I'm writing this I kind of want to make a plus sized version for myself.

Two keys to getting this done in time:
1. The size of the quilting (bigger spacing than I would normally do).

2. The size of the quilt. I used the "craft size" batting, 36" x 44" I think. The last baby quilt I made was much bigger. Bigger is nice but in the end it seemed like overkill for a baby. This small size is much more conducive to blankie-fication which I would love to see happen with something I've made.

Sarah and Olivier picked out the backing fabric for the table runners for their wedding but it didn't come in time for me to use it. I'm glad I was able to put it to good use.

And of course, one must make a matching card from the scraps.

PS I've been wanting to attempt actual pattern writing, not just the half-assed variety I am wont to do. I thought I would start with some sort of free pdf and see what kind of interest is out there. Would you like to make this quilt? Drop me a note or a comment if so. I think this one would be a good start. Thanks!

Monday, April 13, 2009

Back to Bubbles

I recently played major catch up (though I'm still not quite caught up) on my Common Threads bee blocks. You can see the whole lot here.
This is the last one I finished.

It's for Jacquie who is making a quilt for her teenage son. The instructions were "minimal, modern and masculine." The inspiration for this design came partly from reading about Dale Fleming's technique for sewing pieced curves which I found here at Dioramarama.com. If you want to learn this technique you can visit either of these sites for thorough instructions but I thought I'd walk you through the basics of this block. It was a little different because of the multiple overlapping circles. If this all seems confusing you should visit one of the above links. Then it'll all make sense, I swear!

To cut out my circles from the freezer paper, I used this handy dandy tool. It works ok. Better on smaller circles than large ones. You could use scissors as well as long as you draw a perfect circle on the paper to cut out.
I started with the circle in the corner since it was on the "bottom" of all of the overlapping circles. I cut out the size of circle I wanted from freezer paper and ironed the shiny side to the wrong side of my background fabric like so, positioning the hole where I want the pieced circle to be.

The piece of colored dot fabric is what I'm going to piece to the background. It's about 1/2 in bigger all around than the fabric you see inside the circle.
Next, I cut away the BG fabric inside of the circle, leaving a roughly 1/2 in seam allowance.
Then I clipped the curve right up to the paper, all the way around.

Next, I took a glue stick and glued the clipped edge to the back of the freezer paper. This should make a nice smooth curve if you look from the other side.
When that glue was dry (which only takes a few seconds) I applied more glue to the back of the clipped fabric which I pressed the colored dot fabric to, thus allowing me to remove the freezer paper all together.

Tada. Unfortunately I have no photo of the actual sewing. You press and sew along the nice little crease you've got there, all the way around your circle, or semi-circle in my case. Flip it over and voila.

To make an overlapping circle I just placed my next freezer paper stencil over the seam, doing everything the same, treating the pieced er, piece as a solid background.
This only got tricky when it came to gluing the seams down. Because there were multiple layers of fabric I had to do some creative trimming. Also, this background fabric was some thick-ass linen! Things got a little bulky which is why some of my circles aren't exactly perfect. I would not do this again with fabric like this. Cotton on cotton though would be much less of a hassle.
I did the last three circles all at once since they weren't overlapping each other at all. The smaller circles were harder to sew than the large ones.
And that's it! Again, this is no where near a comprehensive tutorial so if you really want to try this technique visit the links above.