You will need: at least one flip flip that fits your foot, some vinyl, cotton fabric for the top of the slippers (call it your main fabric), muslin or something that kind of matches your main fabric (this fabric is not meant to be seen but you might get a little bit peeking out of the edge of your slippers so pick something that will be camouflaged), bias tape 1/2 inch wide or fabric to make your own bias tape, for the straps and batting (I used polyester because it is fluffier and it will hold up better under my feet).
Also handy: disappearing fabric marker, bias tape maker (if you're going to make your own) and a walking foot for your machine. You don't have to use one but I did. Now that i have one I find myself using it more often than not. It's awesome.
1. On the back side of your vinyl, plop down your stinky old flip flop and trace the sole using a disappearing marker.
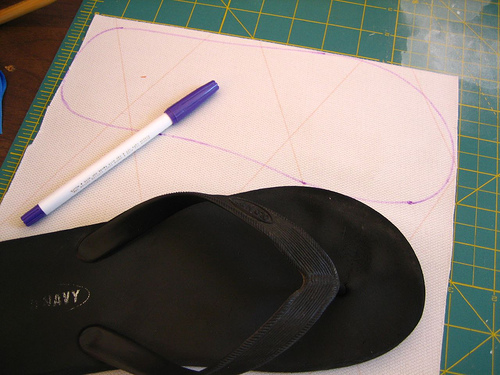 Now fold the vinyl over on itself, right sides together and pin around the sole outline so you have two layers of vinyl. Don't pin inside of the outline because the pins will leave visible holes in the vinyl. It doesn't bounce back like regular fabric. Once you're pinned, cut along the outline. Now you have a sole for each foot!
2. Use one of your vinyl soles as a template and lay it over your main fabric and your muslin, each folded in half, right sides together. Trace around the soul, about 1/2 in away from the edge of the vinyl. This does not have to be perfect. If you're scared, give yourself more than 1/2 of an inch. Now pin it all together and cut on the line.
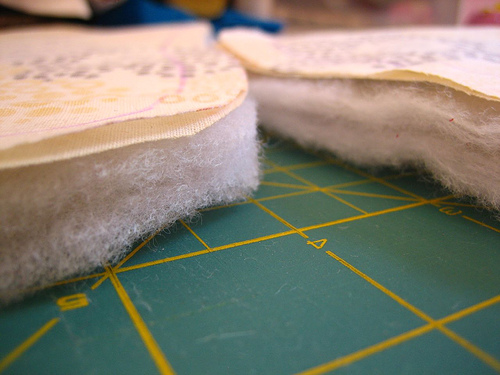
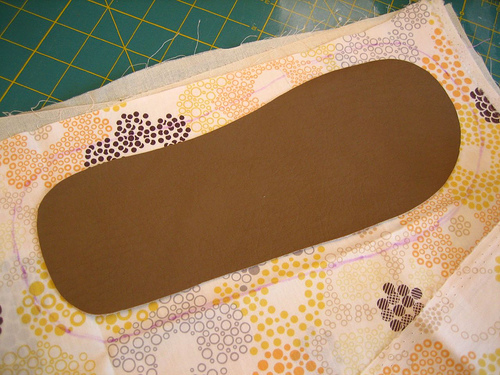 Repeat this step with the batting. I used two layers of batting for each slipper which means you need to cut out four pieces. Remember to add the roughly 1/2 in seam around the batting as well!
3. Layer your pieces as so: two pieces of batting on the bottom, muslin in the middle and main fabric, right side down, on top. Be sure you've got right and left foot accounted for. Pin it all together (I didn't...I'm sorry, I'm reckless).
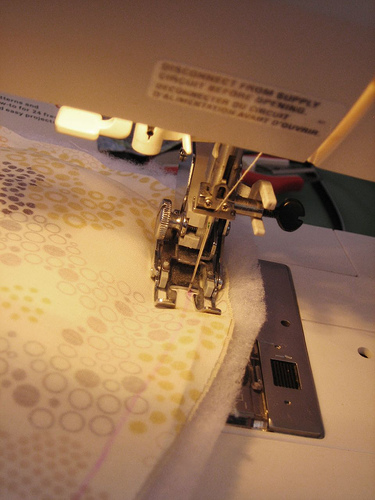
4. Now take one of your vinyl soles and center it over one of the little stacks that you just made. Trace around the exact edge or the vinyl, then put the vinyl aside. This is your sewing line. Sew along that line, around the entire perimeter of the stack, leaving a two to three inch opening on one side for turning.
 Repeat with the other stack.
 5. Trim the seam allowance to 1/4 of an inch on both slippers.
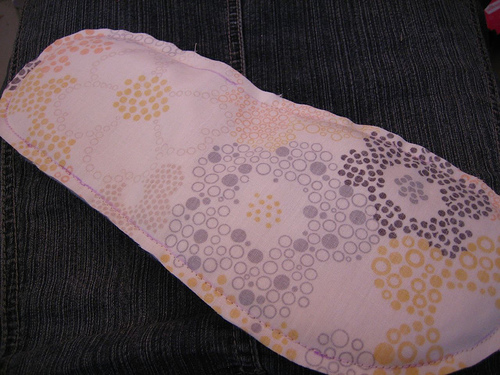 Now turn the insole right side out, so that the main fabric is on top, the muslin is on the bottom and the batting is in the middle. Make sure that the seam allowance on the opening is tucked inside, feel free to press it if you want.
5. For the strap, I made my own not-on-the-bias tape (it doesn't need to be cut on the bias for this). I cut a two inch wide strip of fabric,
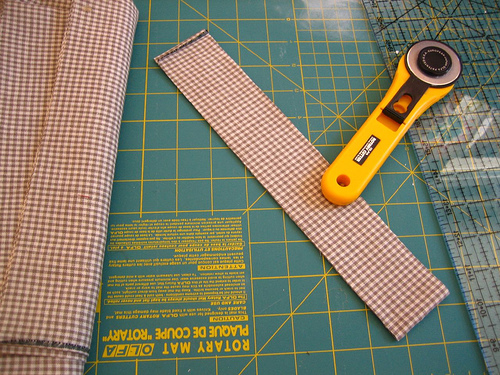 then I fed it through my bias tape tool and pressed. If you don't have one of these, for this project you can just fold the two sides of the strip into the center and press.
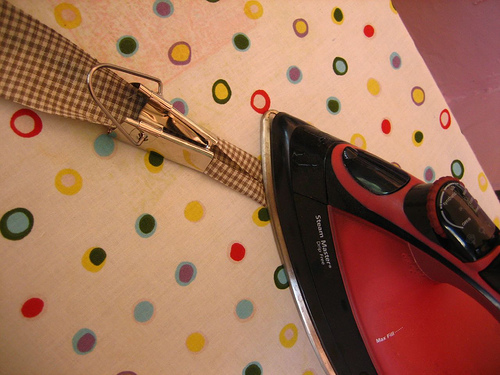 Then fold the whole thing in half and press, so that you have half inch tape. You can of course use premade bias tape.
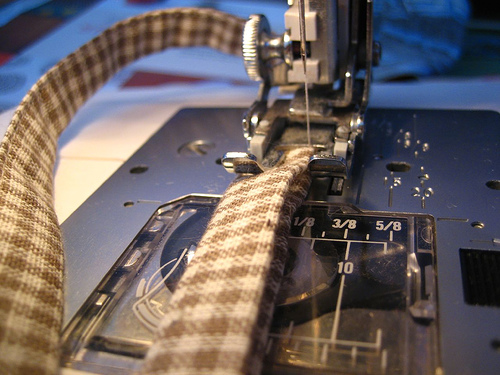
Next, sew along the open edge of your tape like so:
 You need 12 inches of tape for each slipper.
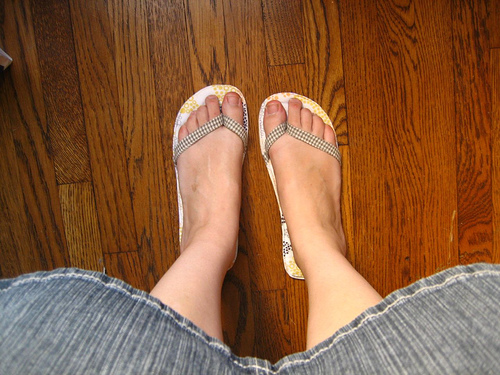
6. Put your turned out insoles on the floor and center your feet over each one. With your disappearing marker, make a mark in between your first and second toes on each insole. This is where you are going to sew down the center of your strap.
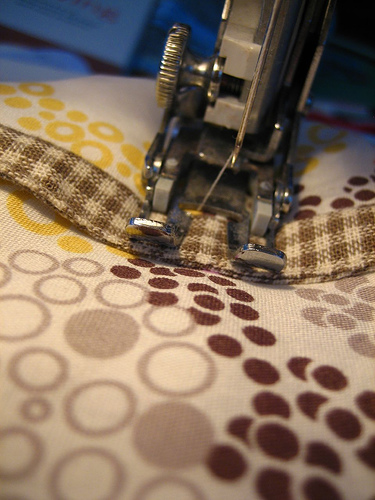
Cut a 12 inch piece of the strap. Pin the strap to the insole where you marked between your toes. The strap should be perpendicular to the insole (like a cross) and there should be five inches of strap pointing towards the inside (where your big toe is) and seven inches of strap on the other side. Sew over the strap at the between your toes mark, back stitching several times.
7. Put the slipper back on the floor and put your foot back on it, this time with the straps coming up from between your big and second toes. You want to mark where the straps will be sewn on the edge of the slipper so pull them over your toes to fit your feet. They should be tight enough to stay on but loose enough that they are easy to slip on. Make a diagonal mark on the straps, where they meet the side seams and mark the side of the slipper, on either side of the straps. Take your foot out and pin the straps in place, lining up the marks and wrapping the excess strap under the insole.
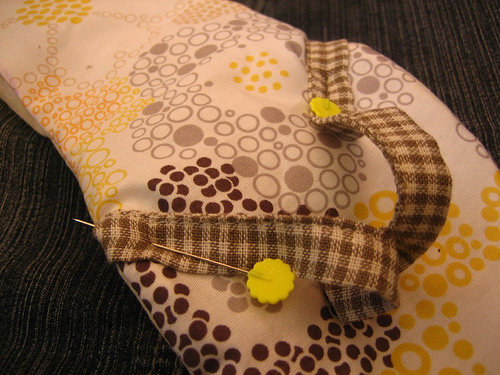 Trim the straps so that there is only 1/2 an inch pinned underneath the insole.
8. Lay the insoles on the vinyl soles, wrong sides together and edge stitch all of the way around the slipper, over the straps and closing the opening you left for turning. If necessary, trim the vinyl to match the insole.
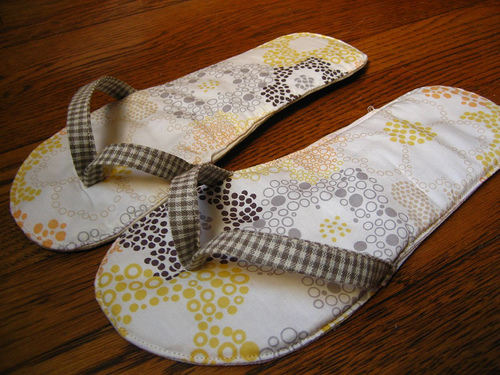
Done! Now get comfy and stay cool!
Holy cow those are awesome! I have to try a pair of these--thank you so much for the tutorial!
ReplyDeleteLiz, those are soo cool! I will add it to my to do list!
ReplyDeletethese are adorable!! (must learn to use a sewing machine) sigh...maybe one day. :)
ReplyDeleteSo cute! I hate when my feet get hot in slippers so these are perfect :)
ReplyDeleteThey are dream, i saw a pair of them in a magazine, and wished i could do it self. So this so wonderful, i found this wonderful tutorial, i will try it surely. Thank you for sharing this nice tutorial.
ReplyDeleteloves,
Feruzan
Too cute! Thanks for sharing, and I especially like the name of the category you put this under. Half-assed tutorials? I'm so there!
ReplyDeletethese are great! I saw your link on CRAFT, btw. :)
ReplyDeleteI recently saw this http://www.makezine.com/blog/archive/2007/09/homemade_nonslip_slippers.html?CMP=OTC-0D6B48984890 on make as well, which might be helpful to make them less slippery around the house on slick surfaces.
ReplyDeleteI found these last night and made them up tonight, your half-assed tutorial is wonderfully done.
ReplyDeleteI have them on my blog if you'd like to take a look along with a link to your wonderful tut. Thnak you.
I meant THANK YOU. 1am is not a good spelling time.
ReplyDeleteBrazil...
ReplyDeleteGostei muito do seu site e de seu post sobre as chinelas... Muito bom mesmo...
Great idea! Thanks!!!
ReplyDeleteWonderful idea! I'll try for this summer! ^^
ReplyDeleteOkay, I guess I could see them closer. I just had to click on the tutorial link. Silly me. I wish I had sewing stuff.
ReplyDeletethis or should i say that? is/are genius!
ReplyDeleteThank you for this tutorial. Very well done.
ReplyDeleteSo fun! Or should I say SEW FUN! I made myself a pair today! I am delighted with how comfortable they are and am thinking of making a pair for my sister-in-law as a present.
ReplyDeleteThank you for the tutorial!
this is such a great idea! I just joined a slipper swap and im collecting ideas for when I get my partners info. These are so great!
ReplyDeleteThose are so cute. I am going to make some for gifts.
ReplyDeleteSo I'm wondering--what kind of vinyl do you use? Is it the kind with the soft backing or does it even matter? Thanks!
ReplyDeleteAlready have the machine up doing a quilt, I,ll take time out to do the slippers, not that it,s hot here in uk
ReplyDeleteThis pair of slipper is very cool!
ReplyDeleteMany thanks for this HOW-TO. :)
I just made a pair! They're not as pretty around the edges as yours, but they serve their purpose and I am loving them. Thanks for the tutorial!
ReplyDeleteThese would be great to take for pedicures rather than using the disposable ones your get at the salon!
ReplyDeleteI love the slippers! I made a pair today and will be blogging about them next week - THANK YOU for the inspiration!
ReplyDeleteso cute¡¡¡¡¡
ReplyDeletegreat
xxoo
maria
totally trying this someday!
ReplyDeletethanks for this information
ReplyDeletepicture framer glasgow
i was very nice going through it.
ReplyDeletethanks
Great!!
ReplyDeleteThanks
Nice weekend :)
Oooh, perfect for taking on vacation... light and pretty!
ReplyDeleteWhat sort of vinyl should I use? I mean, cut up a flannel backed table cloth maybe? Hm, my brain just isn't coming up with a strong enough material. Arg. BTW, you are awesome, I love the idea and instructions!
ReplyDeleteThese look SO easy, I am so going to try these!
ReplyDeleteI am a beginner and only 11 but....:)
I think this is so cool! I am SO going to make these!
ReplyDeleteawesome dude!
ReplyDeleteKiller tutorial...